
Last updated Nov 14, 2025
When you organize your team with a Teamup calendar, you can maintain centralized control and security while providing autonomy and flexibility.
As a team leader, you know that organizing and communicating with your team can take up most of your working hours. Sometimes the systems and methods that worked in the past need a major upgrade. The tools that work best allow you to give more autonomy to your team, while maintaining streamlined, central management. And, of course, it’s important to keep information secure.
A powerful, intuitive, and customizable Teamup calendar might be just the thing. Take a look.
- Create a team calendar
- Create sub-calendars for your team
- Set up calendar access for your team
- Make Teamup work for you
Create a team calendar
Do you already have a Teamup user account? Make sure you’re logged in, then use the Team Calendar template. Your new Team Calendar will be on a free trial of our Pro plan. You can decide which pricing level is right for you. If you don’t enter payment information, the calendar will revert to the Basic (free) plan when the trial ends.
If you don’t have a Teamup user account, you’ll be prompted to create one before you can use the Team Calendar template. Once your account is activated, log in and create your new calendar from the Team Calendar template:

Customize sub-calendars for your team

Open your new team calendar. It comes preloaded with several sub-calendars. To change these, configure event fields, and adjust calendar defaults, you’ll go to the calendar settings (open from the blue menu in the top right corner of the calendar). In Settings > Calendars, you can add, delete, modify, and manage all the sub-calendars on your team calendar.
Start by customizing the sub-calendars for your team:
- Change the calendar titles for your team members and adjust the colors if desired.
- Create additional sub-calendars for any remaining team members.
- Organize sub-calendars in folders if desired.
For smaller teams, it’s often good to keep it simple. For larger teams, or for managing multiple small teams, use folders and color-coding to organize. You can group each team’s sub-calendars into a folder. You can nest folders for deeper organization, if needed.
So, from this initial calendar structure, you can add and organize sub-calendars for the team calendar you need. Here are a couple of examples:
Color-coded team organization
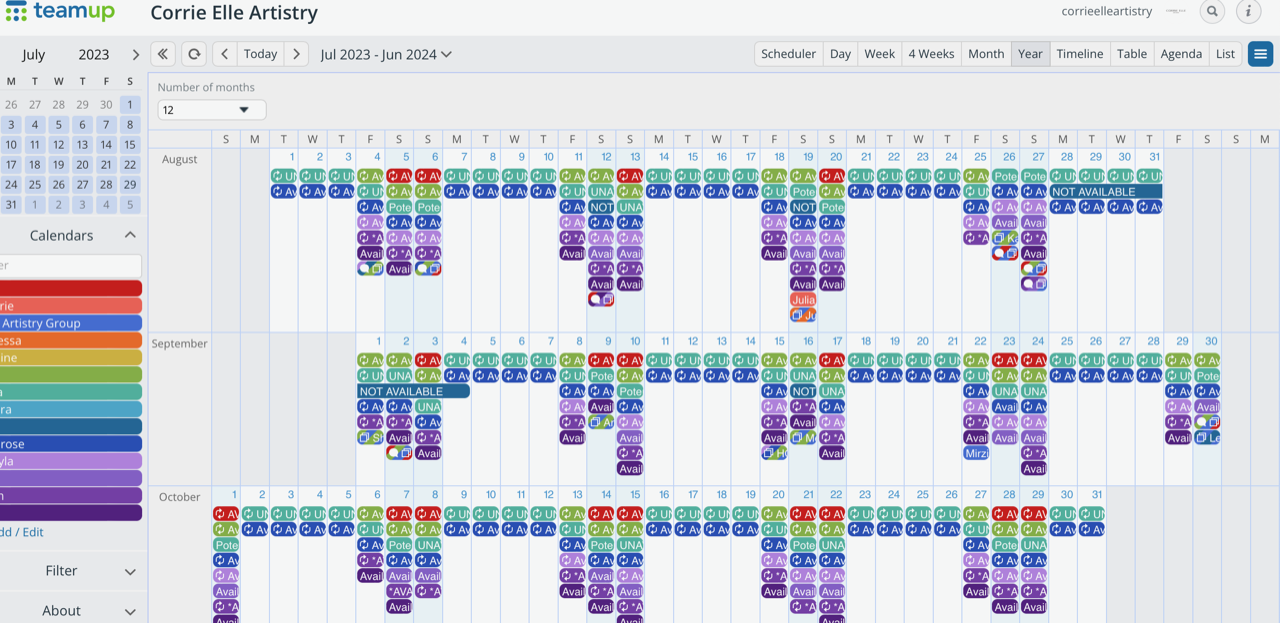
Corrie Elle Artistry has a rainbow of sub-calendars, with one assigned to each team member.
Shift scheduling
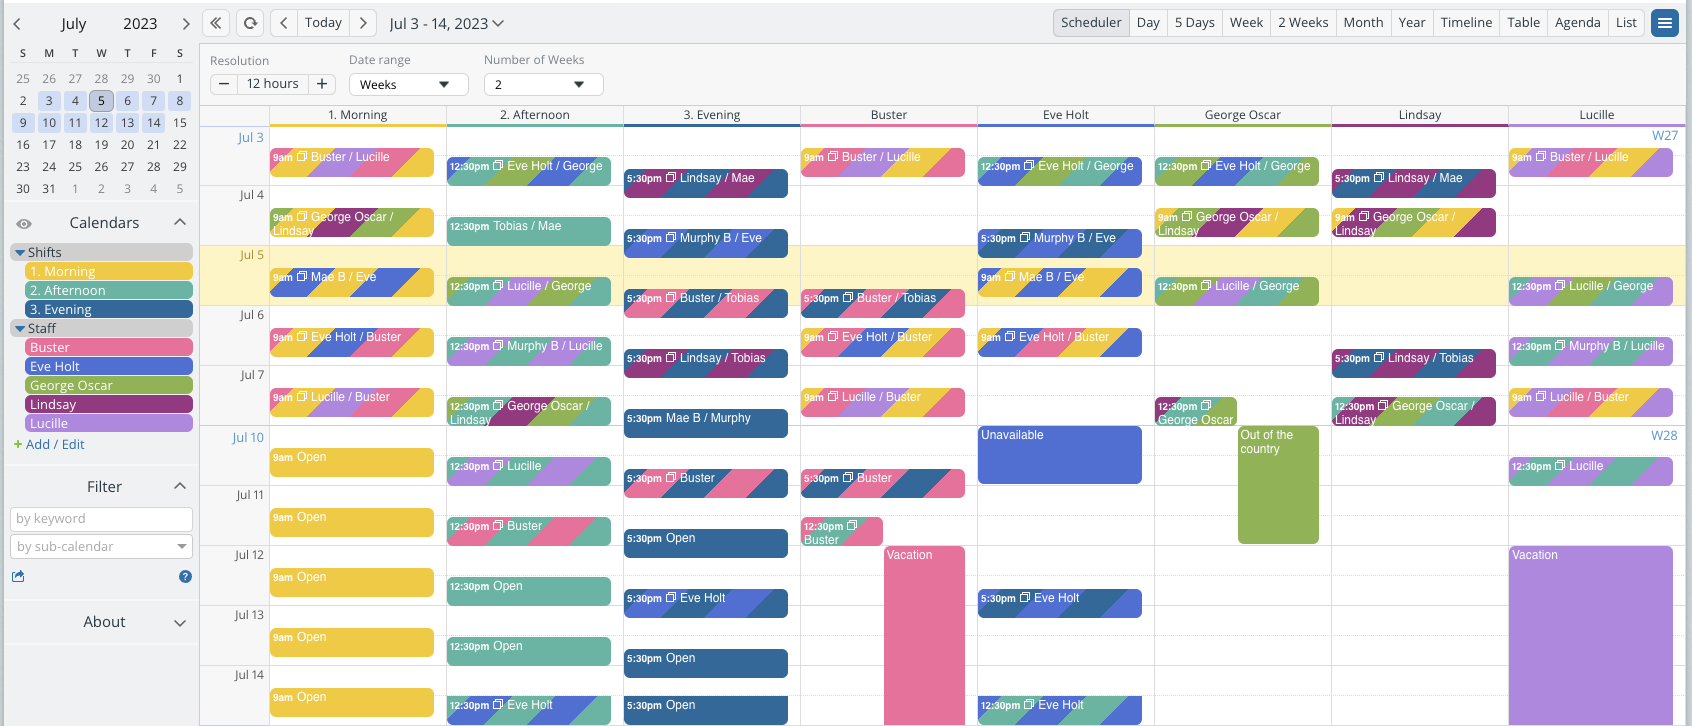
Create a shift scheduler by adding shift sub-calendars and organizing calendars in folders. Scheduler view (shown here) is great for visualizing availability.
Trade show and conference planning

Coordinate your team for industry events. Add iCalendar feeds for the official event agenda, create sub-calendars to book meeting rooms, and group in folders.
Regional team management

Manage multiple teams from one master calendar. Organize each team’s sub-calendars in a separate folder. Collapse folders to view only one team’s calendars at a time.
Working with sub-calendars
You can change how sub-calendars are organized any time without affecting the calendar data on the individual sub-calendars. Remove, rename, or reorganize folders and sub-calendars as needed. You can also deactivate sub-calendars, then activate as needed. If a sub-calendar is no longer needed, you can permanently delete it. All sub-calendars you create are under your control, as calendar administrator.
Give calendar access to each team member
With sub-calendars in place, it’s time to set up calendar access for your team. Account-based users have an added layer of security and can use a synced global dashboard and event reminders. For team members who will be regularly using the calendar, we recommend account-based access.
Shareable calendar links are very helpful if you want to give temporary calendar access to an external collaborator or provide read-only access to a group.
For both account users and links, you choose which sub-calendars to share and set the level of access allowed. This way, you can keep information secure and confidential, when needed, while also giving your team autonomy and flexibility. You maintain control, but your team members can work confidently and efficiently.
Customized access for typical team use
In a typical team scenario, each team member can add events to their own sub-calendar and view other team members’ schedules. To set up access like this, give each team member modify or modify-my-events access to their sub-calendar and read-only access to the other team members’ sub-calendars.
Your case may be a little different. For example, you may have a team leader who schedules and assigns work for other team members. They’d need to have a modify access to all the team sub-calendars. Or you may want team members to access only their own sub-calendar. You can customize access to work for your team.
As the calendar administrator, you always have control of calendar access. You can change permissions for any user as you decide the best way to use your team calendar. And if an employee leaves, you can revoke their calendar access by removing that employee as a calendar user.
Make your Teamup calendar work for your team
Once you have your team calendar set up, and you’ve set up calendar access for your team, explore more ways to make Teamup work for you and your team.
- Install and use Teamup mobile apps: try out the Teamup mobile app for iOS or Android. Full functionality in a streamlined, mobile package so everyone can work on the go, stay updated, and keep communication flowing.
- Explore Teamup’s features to see how they can make life easier for you and your team:
- Custom event fields to track workflow, priority, or status, keep customer information, include project details, and systematize processes.
- Event signups to assign tasks or projects, track participants, book appointments, and plan team events and meetings.
- Event comments to keep internal notes, discuss projects and events, log decisions and details, gather feedback, and have time-stamped records.
- Event pages to promote and share events, keep track of project information, collaborate with sub-contractors, and communicate with clients.
Ready to make team scheduling easier? Use our Team Calendar template for a quick start.