
Last updated Feb 22, 2024
With Teamup’s color-coded sub-calendars, you can assign a different sub-calendar to each individual, team, project, or other need. Keep it all organized by arranging the sub-calendars in folders.
Sub-calendars are a great way to sort and organize the information you need to keep on your calendar. They work as individual calendars, but are contained within your master calendar. You can set up your master calendar with multiple sub-calendars, and see all the events from these sub-calendars in one big-picture view.
You can assign a sub-calendar to a person, an event, a topic, a project, or, really, anything. It depends on how you use your calendar, and how you like to categorize the different areas of your business, organization, or personal life.
In this post, we’ll look at some of the features and ways you can work with sub-calendars:
- What are sub-calendars?
- What can I do with sub-calendars?
- How many sub-calendars can I have?
- Create a sub-calendar
- Create an inbound iCalendar feed
- Organize sub-calendars
- View sub-calendars
- Ways to organize sub-calendars
What are sub-calendars?
When you set up a calendar with Teamup, you can use it just like it is, no changes needed. But to really get the full power of a Teamup Calendar, you’ll want to take advantage of the endless possibilities available with color-coded sub-calendars.
Sub-calendars are individual calendars that live within your main Teamup calendar. You’ll find them in a list on the left sidebar of your calendar:
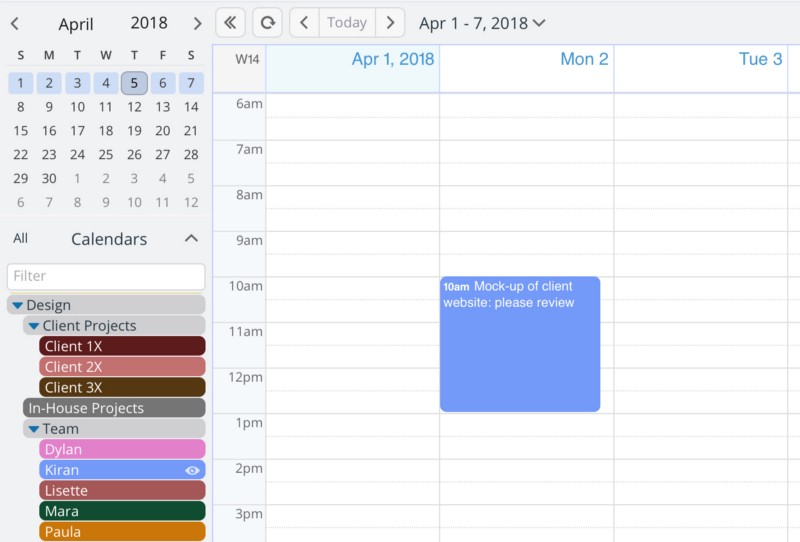
What can I do with sub-calendars?
You have a lot of possibilities and options with sub-calendars:
Organize sub-calendars in folders.
You can create multiple layers of organizational hierarchy by nesting folders. For example, you might create a top-level folder named Staff. Within that folder, you can add more folders for individual teams: Design Team, Content Team, and Service Team. Within these second-level folders, you could put the sub-calendars assigned to the individual team members. Here’s an example of what this would look like in your Teamup Calendar:
Learn more about folders here so you can organize your sub-calendars.
Toggle the sub-calendar on and off in your calendar view.
As you can see in the gif above, you can toggle sub-calendars “on” and “off” in your current calendar view. Click (or, on mobile, tap) the sub-calendar’s title bar to toggle that sub-calendar on or off. Click or tap the Eye icon to see only that sub-calendar. Use the Eye icon on the folder’s title bar to toggle all the sub-calendars within that folder.
Choose the name and color for each sub-calendar.
The name can be changed at any time. Change the name or other options for a sub-calendar by going to Settings > Calendars, then click the Edit icon of the sub-calendar you wish to modify. Note that you must open your calendar with an administrator link in order to access the calendar settings.
Share sub-calendars with other people.
You can share a single sub-calendar, a set of sub-calendars, or all your sub-calendars. Sharing is done via account access or with unique calendar links. When you share your calendar, you also control the permissions that you set for each sub-calendar. This gives you the ability to maintain complete control over your calendar, while also allowing others to access it as needed.
Learn more about sharing your calendar.
How many sub-calendars can I have?
Each subscription level of Teamup allows a different number of sub-calendars. See details about pricing and subscription levels here.
Create a sub-calendar
Creating a sub-calendar is easy:
- Go to Settings > Calendars.
- Click on the New button in the top right.
- Select New Calendar.
Type in the name you want your sub-calendar to have, and choose a color.
Create an inbound iCalendar feed
Another type of sub-calendar you can create is an inbound iCalendar feed. This is a feed that comes from another calendar and will appear in your Teamup Calendar as its own unique sub-calendar.
To create an inbound iCalendar feed, first you’ll need to get the iCalendar feed URL from the original calendar. The location of the iCal feed URL is different for various calendar services. See this post for instructions on finding the iCal feed URL from several widely used calendar services.
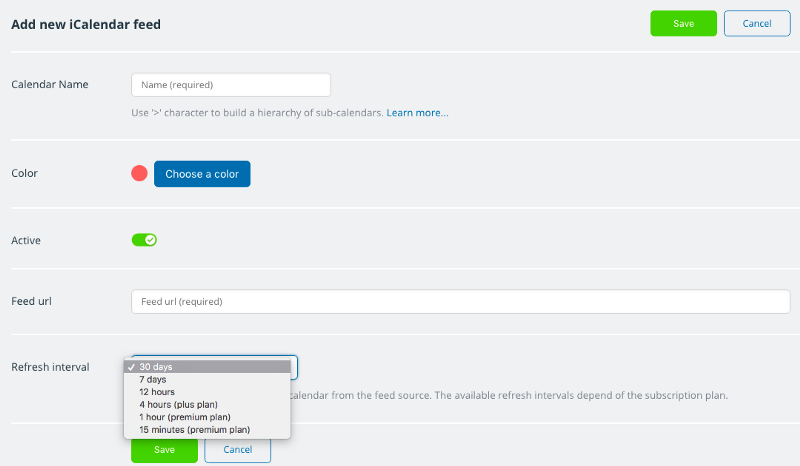
Once you have the iCal feed URL, copy it to your clipboard or keep it handy. In your Teamup Calendar, go to Settings > Calendars, then click on the New button in the top right. Select Add iCalendar feed.
Fill in the name for the sub-calendar feed, choose a color, and paste or type in the iCal feed URL. You can also set the refresh interval depending on your subscription plan. Click Save, and you’re all set.
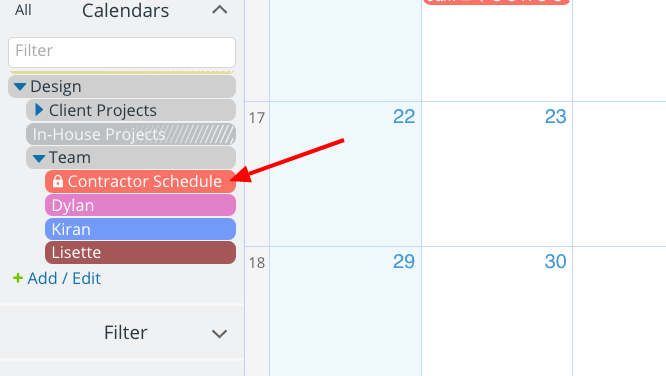
Your inbound iCal feed will now appear in your sub-calendar list, with a lock icon to indicate that it is a read-only sub-calendar. You cannot make changes to the original calendar from an inbound iCal feed: feeds are only for viewing, so you can get all your calendar information in one place and see a big-picture view of your schedule.
Inbound iCalendar feeds work like sub-calendars: you can toggle them on and off individually, organize them in folders, modify the title or color, see event details, share individual events, and share the entire inbound feed via unique calendar links.
Organize sub-calendars
You can group sub-calendars together within folders, simply by using the > symbol to create a hierarchy.
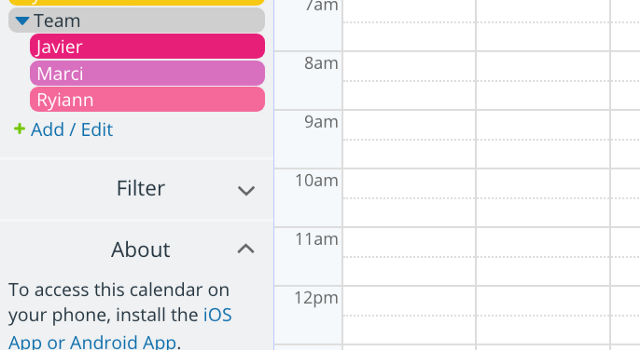
For example, you could create individual sub-calendars for everyone on your team, under a folder called Team. You’d name them like this: Team > Marci, Team > Ryiann, and Team > Javier.
Now you’ll have a folder named Team with those sub-calendars in it:
You can create layers of organization, as mentioned above, by nesting folders. This creates a multi-level hierarchy. Simply use more of the > symbol to build the organizational levels you need.
For example, you can organize your sub-calendars by multiple levels of geographic region: Dealerships > Mid-West Region > Missouri. Then, within the Missouri region, you could have a sub-calendar assigned to each dealership.

You can add additional levels of organizations, as needed, with more nested folders. You can also add sub-calendars to any folder, no matter what level; so you could have some sub-calendars in the top-level Dealerships folder, if needed, as well as nested folders and sub-calendars inside of it. See more about using folders here.
By default, all folders and sub-calendars are ordered alphanumerically. To control the ordering of sub-calendars or folders in a different way, you can use numbers or symbols. Here’s an example:
View sub-calendars
You can work with your organized sub-calendars several ways:
- Collapse the folder to hide those sub-calendars.
- Expand the folder to show those sub-calendars.
- Click the eye icon on the folder to show only events from those sub-calendars.
- Click on each sub-calendar to toggle it on or off from view.
- Click on the folder to toggle all those sub-calendars on or off from view.
The sub-calendars don’t disappear when you toggle them off; the data is there, it’s just hidden from view. That way, if you want to work with events from a particular sub-calendar, or set of sub-calendars, you can focus only on them.
Hidden sub-calendars are still shown on the calendar list; they’re lighter in color, with white bars across them. To show a sub-calendar that’s hidden, click on it to bring it back to view.
Ways to Organize Sub-Calendars 
Now that we have the basics down, let’s see how you could use sub-calendars to organize all the information coming your way.
Assign sub-calendars to individuals
You can designate a specific sub-calendar for an individual, and then give that individual access to their own sub-calendar only.
Here are a few examples:
 | Organize your family life by creating a sub-calendar for each member of your household: How Teamup Makes It Easy to Manage Family Life |  |
 | Collaborate with your team by using sub-calendars to organize various projects: How to Manage a Team Handling Multiple Projects with Teamup |  |
 | Work with complex, changing class schedules by assigning a sub-calendar to each instructor and/or class: How The Princeton Review Makes Use of Teamup Calendar |  |
Assign sub-calendars to spaces
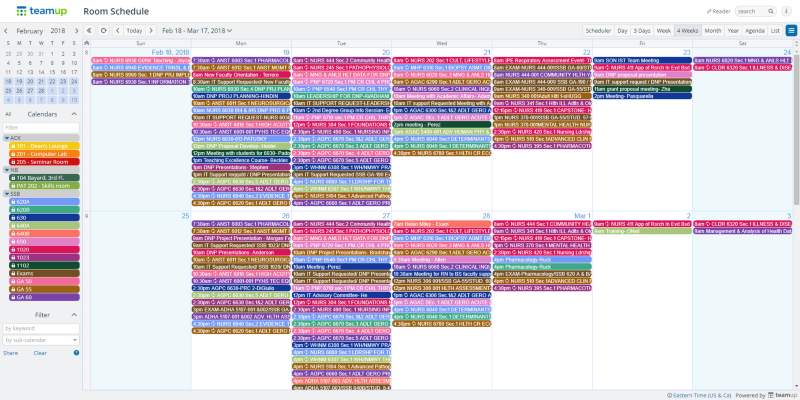
You can also use a sub-calendar to manage a specific space. This is particularly helpful in managing large, complex events such as conferences and trade shows. For example, you can create a sub-calendar for each meeting room, then schedule the events taking place in that room on the designated sub-calendar. Anyone can view the calendar to see when the meeting room is free, and when it has a scheduled event.
These examples could give you some good ideas:
 | Manage shared community spaces by creating a sub-calendar for each specific space, and allowing members of the community to book their time for the space: How a Tennis Club Runs a Totally Decentralised Booking System |  |
 | Oversee a large, multi-use area — such as the City Park in Dublin — by creating a sub-calendar for individual areas within it and scheduling events and maintenance on the sub-calendars: Teamup for Park Reservation at City of Dublin |  |
 | Create open times, share with clients and partners, and allow them to schedule their own appointments: How to Use Teamup for Simple Appointment and Space Booking |  |
Assign sub-calendars to projects, tasks, or topics
Another helpful way to organize sub-calendars is to assign one for a project or task. For complex projects, you can create an entire set of sub-calendars within nested folders to keep all aspects organized and sortable.
You can also designate a sub-calendar for a recurring task or set of tasks, such as Household Chores or Menu Planning or Sales Follow-up. Then schedule the individual tasks and events related.
- Share your restaurant’s upcoming specials, or any sort of recurring discount, event, or specialty item, with a designated sub-calendar. Then share the calendar via social media (or one of the other many sharing options).

You can also use sub-calendars to manage something as complex as a conference agenda, or something personal like building good habits:
 | It’s easy for conference teams to create staff schedules and see availability at a glance: Easy and Flexible Conference Agenda |  |
 | Be accountable, set triggers, schedule rewards and celebrate milestones for stronger habits: Build Stronger Habits with a Solid Habit Framework and Teamup |  |
Sub-calendars give you a centrally managed, customizable way to work with calendar data.
You can turn all sub-calendars on to see a big-picture view. You can bring selected sub-calendars into view to focus on the details, whether that’s a particular person’s schedule, the events booked in a meeting room, or a team project. You can even create a default sub-calendar view so you automatically see the information you need most often.
Sub-calendars can be created (and deleted) only by calendar administrators. So if others on your team need to add, remove, or modify sub-calendars, you’ll have to do it for them (as the calendar administrator). If you give administrator permission to someone, be aware of the power you’d be giving to that user. Proceed with caution.
You can watch this quick video to see more on how color-coded sub-calendars work. Have questions? Check out our Getting Started Guide for a jump-start on all things Teamup.
Header photo credit: Ricardo Gomez Angel on Unsplash