
Last updated Sep 20, 2022
Set up a Teamup calendar to coordinate your team for trade shows, get the important meetings, and end scheduling frustration.
Trade shows are an important part of many industries. Many teams attend trade shows in part to learn about industry news and trends, and also to book meetings and coordinate with key people: clients, potential customers, industry contacts, vendors, distributors, partners, and more.
Table of Contents
- Supervise the team schedule
- Create and organize sub-calendars
- Create a link for each team member
- Set access permissions
- Set up Teamup mobile apps
- Keep notes with event comments
Supervise the team schedule
If you’re supervising a team attending a trade show, you want to make sure that each team member is using their time wisely and making the most of opportunities. You also want to avoid scheduling mistakes like double-booking, missing an important session, or having multiple team members book a meeting with the same contact.
You can use a shared Teamup calendar to coordinate your team’s schedule when attending trade shows. Give autonomy so each team member can take charge of their own schedule–and so all those scheduling decisions don’t fall on your shoulders– but keep a central overview to avoid errors, misses, and mistakes. Here’s how.
Create and organize sub-calendars
Start by creating a new Teamup master calendar here. Then you’ll want to create an individual sub-calendar for each member of your team. You can organize sub-calendars in folders, if desired. This can be helpful if you have a few different teams to coordinate, for example, a Sales team, a Marketing team, and a Development team. Or perhaps you want to include a member of the office staff on the calendar to help oversee the scheduling.
Be sure to disallow overlapping events on each sub-calendar, to prevent double-booking:
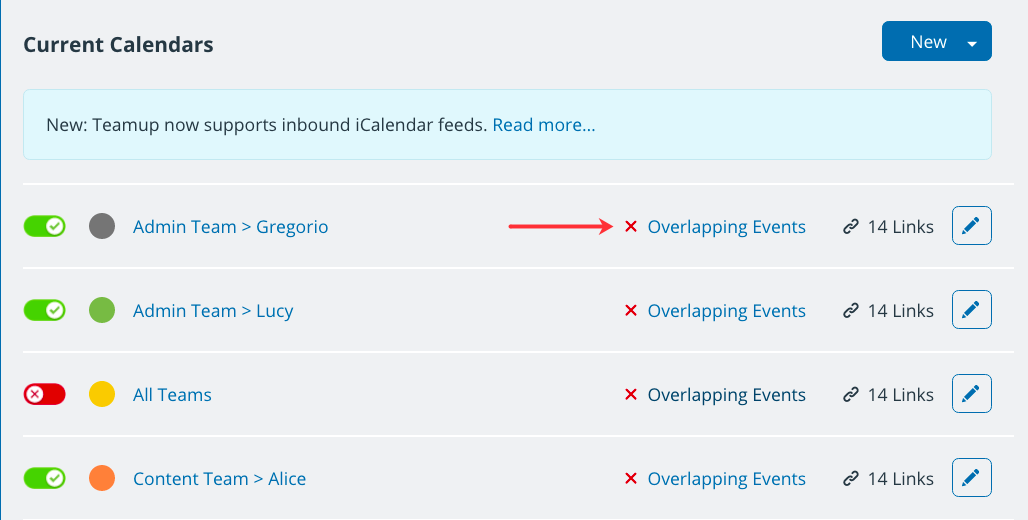
Here’s an example of how you might organize a calendar.
Note that you can expand and collapse folders as needed, and toggle individual sub-calendars or entire folders on and off from view in the calendar. More details here.
Create a link for each team member
The next step is to give each team member customized access to the calendar. The way to do this is via a unique, customized calendar link. Go to Settings > Sharing and click on the blue New button in the top right. We recommend that you name each link with the name of the individual who will be using it. This way you can easily remember which calendar link belongs to each team member.
For each calendar link, you’ll choose which sub-calendars to include, and set a level of access permission for each. That means you get to decide what each team member can do on the calendar: read only, modify, add only, etc.
Set access permissions
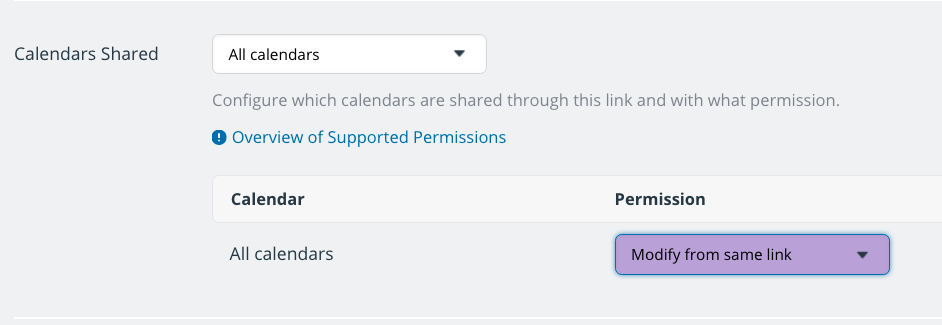
In this scenario, we recommend giving each team member a calendar link which includes all sub-calendars. Each team member should be have a modify or modify from same link permission for their own sub-calendar, and a read-only permission for other sub-calendars. If you want team members to be able to add meetings or suggestions to each other’s schedule, then you could give them add-only permission instead of read-only permission.
Example 1: an administrative assistant
You may have a team member with more responsibility. For example, perhaps you have an administrative assistant who will be scheduling some meetings and ensuring that certain key contacts are included in the meeting schedule. For the assistant, then, you might create a calendar link which has a modify from same link permission for all the sub-calendars. This way, the assistant can add, modify, and delete meetings, assignments, and other events for any of the team members as needed.
Example 2: a member of the sales team
For a member of the sales team, Javier, the permissions are different. Javier is given modify from same link permission for his own sub-calendar, add-only permission for the rest of the sales team’s sub-calendars, and read-only permission for all other sub-calendars:
With this calendar link, Javier can do the following:
- He can add events and book meetings on his own sub-calendar, and modify or delete any events that he has created.
- He will not be able to modify or delete events on his sub-calendar that are created from another calendar link. For example, if the administrative assistant creates a meeting on Javier’s sub-calendar, he can see it but he will not be able to modify or delete it.
- He can add events to the sub-calendars of his colleagues on the sales team. He will be able to edit these events for a short window of time, during his current browser session (up to approximately 30 minutes). After that, he will not be able to modify or delete those events.
- He will be able to see all events and event details on all other sub-calendars, but he will not be able to modify or delete any of these events.
Set up Teamup mobile apps
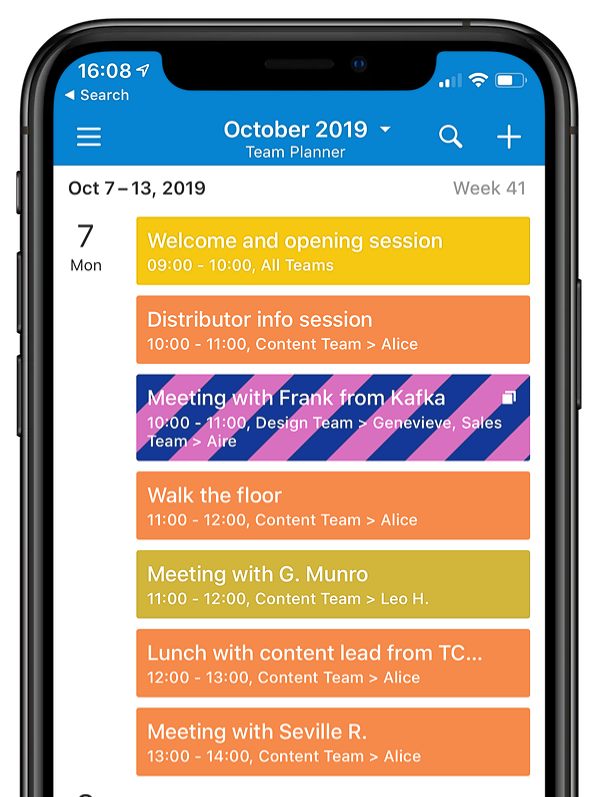
A team calendar on a browser is great for planning, but when you and your team are at the trade show, you need a mobile solution. Fortunately, Teamup has great mobile apps for both iOS and Android. To use these to their full advantage, have each team member create a Teamup user account; it’s quick and free, and with a user account, everyone can take advantage of a synced global dashboard and event reminders.
User accounts
Teamup user accounts provide a central place for accessing Teamup calendars, both those you created and those that have been shared with you. For your team members, this means they can add the calendar to their calendar dashboard, then quickly access it from the Teamup mobile app.
Synced dashboard
When your team members use the Teamup mobile app for iOS or Android, they can log into their user account on their mobile device. Then, the calendar dashboard will automatically synchronize between their mobile device and their browser dashboard. Get more details here for Android, and here for iOS.
Event reminders
Event reminders are notifications sent by email to remind of an upcoming event. Event reminders are available only to users logged in with a Teamup user account. Your team can create event reminders for a single event, or for their entire sub-calendar. If they create an event reminder for an entire sub-calendar, they will automatically be notified of all current and future events on that sub-calendar. More on event reminders here.
Keep notes with event comments
You can enable event comments by default on your calendar. To do so, go to Settings > Event Fields, scroll to Comments, click the Edit icon, then scroll to the Defaults section. Check the box for Comments Enabled. Be sure to click the green Save button.

Now your team can use the event comments to keep notes, ask questions, have discussions, and leave feedback or questions on meetings, sessions, and other events. Using comments as an internal notes feature makes it easy to look back after the event and find all the information. It’s much easier than digging through a separate notes app, random papers, messages, or email.
With this calendar setup, your team has the autonomy to schedule their own meetings, but you can still see the big picture. Everyone can see who’s doing what, and when, to avoid inefficiency or scheduling frustration. Your calendar can enable easier scheduling and better communication, for a trade show experience that’s more valuable for your team.