Last updated Feb 22, 2024
Teamup makes it easy to manage multiple schedules for full-time and part-time staff members, freelancers, contractors, clients, and others who contribute.
In some business and organizational scenarios, you need to manage multiple schedules on a single calendar. For example, you may employ both full-time and part-time staff members. You need to have a big picture of the schedule for the week, knowing who’s working when, and you also need to give assignments to various staff members.
Many media companies have full-time staff members and also work with multiple contributors and guests. These contributors and others may work on a contractual basis, may work regular shifts or only come in for assignments, or may work remotely. A flexible calendar that allows you to oversee all the schedules with the big-picture or granular view you need is invaluable.
Here’s a look at how you could use a Teamup calendar to manage full-time staff, part-time staff, and contributors.
Set up the calendar
After creating your Teamup calendar, create one sub-calendar for every staff member and contributor. We’ve included guest experts in our example, as well as staff, part-time staff, and contributors.
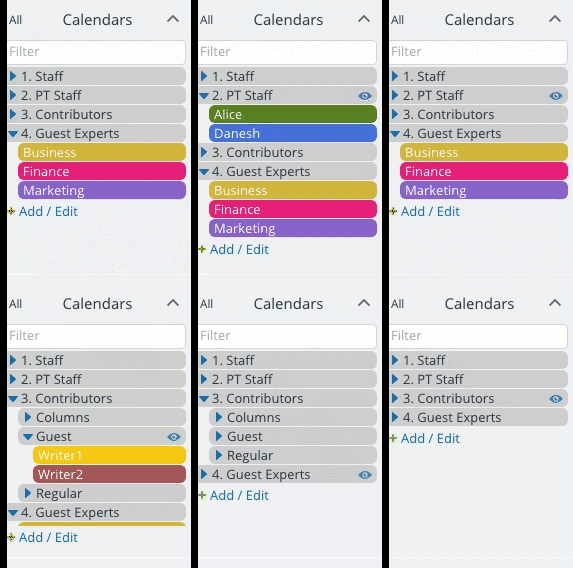
Use folders to sort sub-calendars into various categories. The folder organization makes it easy to view and work with one group at a time when you’re scheduling and reviewing assignments. Folders can be collapsed and expanded, and you can use the Eye icon to view only sub-calendars within a specific folder.
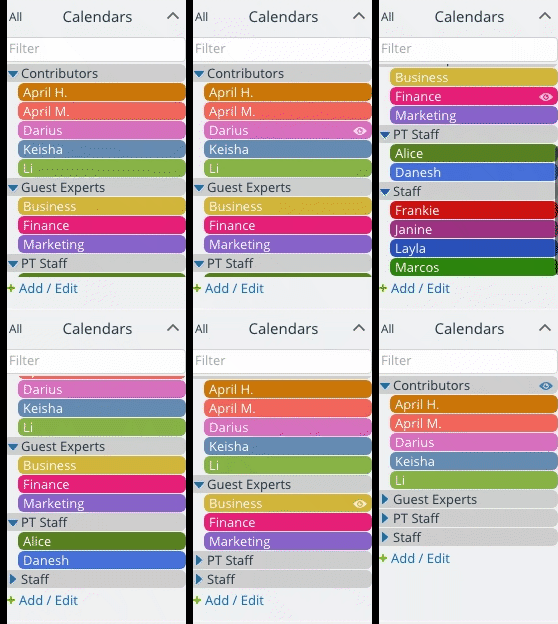
You can make the folders as specific as needed, depending on how many people you’re managing. You can also nest folders for deeper organization.
For example, if you have regular contributors, guest contributors, and columnists, you can create a Contributor folder, then organize individuals inside second-level folders:
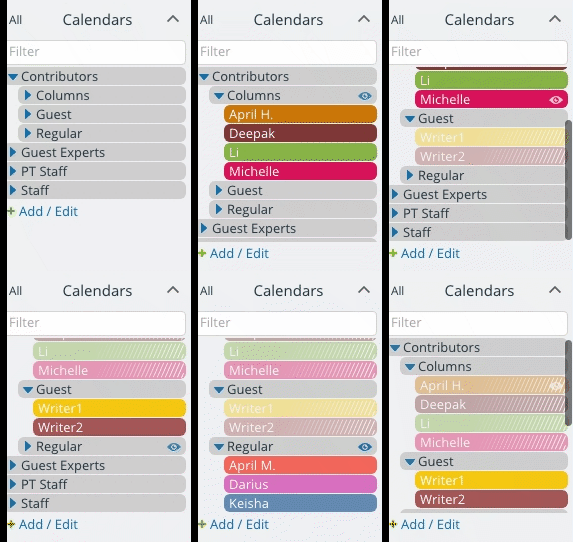
Alternately, if you have large teams, use folders to organize by team: a folder for the Graphic Design team could then be divided into secondary folders for full-time, part-time, and freelance team members.
Remember that you can use numbers or symbols to control how the folders and sub-calendars are arranged. By default, folders and sub-calendars are arranged alphabetically. You can use numbers or symbols to override the alphabetization and arrange the folders in the order you want:
Once you have the sub-calendars created and arranged in folders, you’re ready to start using the calendar.
Share the calendar
To share the calendar with your team, you can use account-based user access or customized shareable calendar links.
With both account-based access and shareable links, you get to choose which sub-calendars to share, and which permission level to apply to each sub-calendar that you do share. You can set one permission level for all sub-calendars, or a different permission for each sub-calendar.
For example, you can give staff members modify permission for their own sub-calendar, and read-only permission for all other sub-calendars. That way they can view everything that’s scheduled, but can only modify events on their own sub-calendar.
Account-based access is a more secure option, which is easier to manage: we recommend account-based user access for all regular calendar contributors and staff members. Learn more.
Customized shareable calendar links are an easy-to-use option which don’t require a login or user account. Calendar links are great when you want to share temporary calendar access or provide public access to an embedded calendar. Learn more.
Calendar access via mobile apps
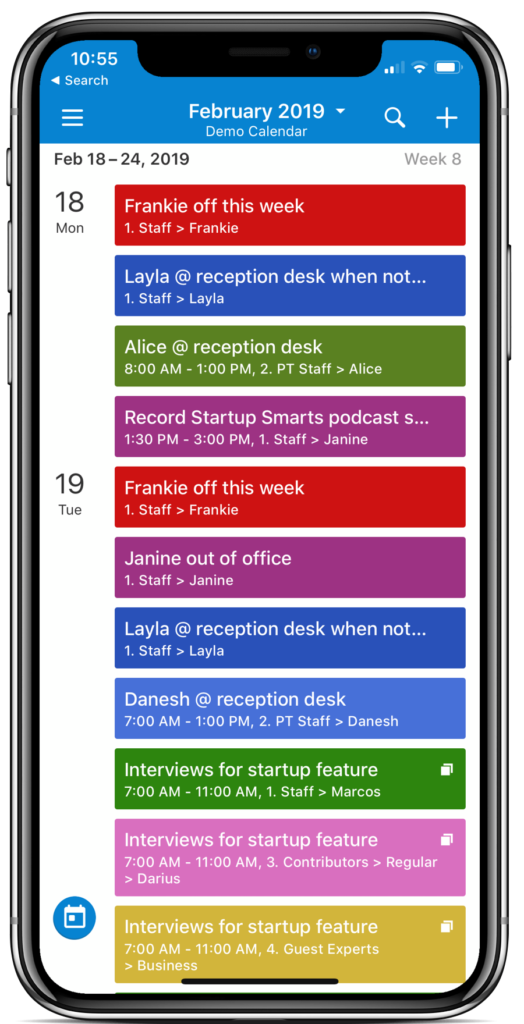
Team members can access the calendar on any browser, or via the Teamup mobile apps for iOS and Android.
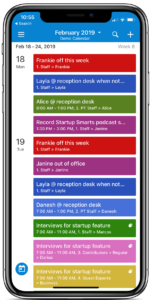
The mobile apps make it easy for everyone to keep up with schedule changes, get assignment details on the go, and add notes or comments to various assignments and events as information comes in. For account-based users, logging into your Teamup user account on mobile will connect you to your globally synced calendar dashboard.
Use the calendar
You’ll use the calendar in the way that makes the most sense for your team and workflow, of course. Here are some ideas that can help you get started.
- Put all events, assignments, projects, meetings, and tasks on the calendar so everyone gets used to checking the calendar for information. This practice alone can save you hours of time; fewer emails, fewer phone calls, fewer messages. Put everything on the calendar and direct team members to check the calendar for information before asking you.
- Assign events and tasks to the people on your team. You can assign an event to multiple team members; these will show up with striping (in the web browser).
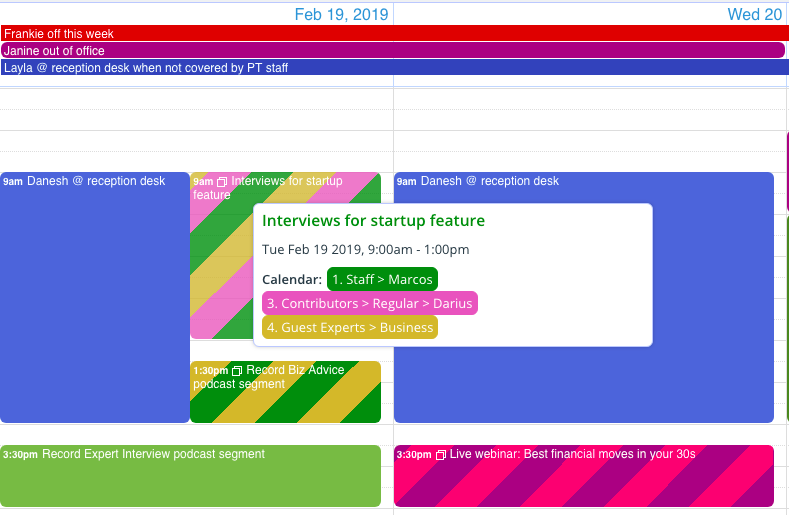
- Use filtering to see only what you need to see. Teamup calendars have a powerful set of built-in filters. You’ll find them on the left sidebar below the list of sub-calendars. You can filter the events in your view by sub-calendar, by keyword, and by the contents of a custom event field; or use a combination for an even more specific search.
- Create recurring events for regular work shifts or repeating events, tasks, or assignments. It’s also easy to move or duplicate an event by right-clicking on it, then select the Move to or Copy to option.
- Use event sharing and signups to ask freelancers or staff members to take on an assignment or task. First, enable Signups for the event. Then you can share the event as a page with the appropriate individuals, or use one of the many sharing options on the Teamup mobile apps. Whoever wants the assignment can sign up for it, and then you can move the assignment to their sub-calendar.
Make smart use of calendar features
There are several powerful calendar features that can make work more efficient for everyone, no matter what kind of schedule they’re on.
Custom event fields
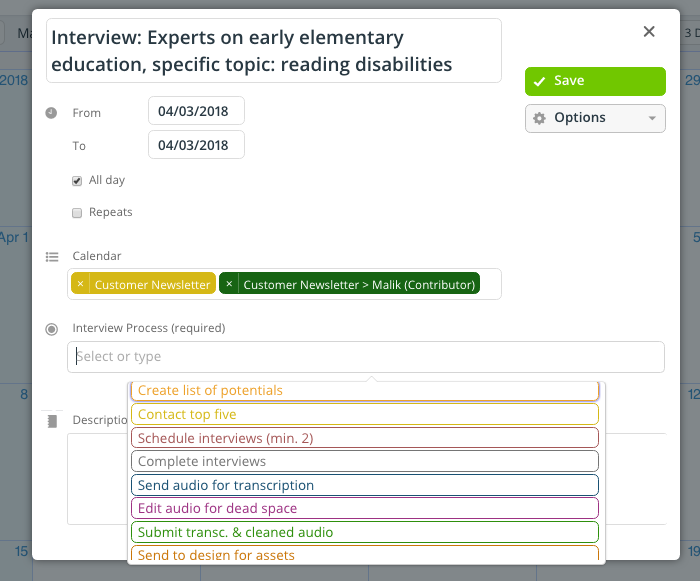
Event fields are fields on the event editor where you can include various types of information for the events on your Teamup Calendar. Default event fields include Who, Where, and Description; with Teamup, you can also create your own custom event fields.
A custom event field can be a single-line text field or can contain choices. Here’s an example of a custom event field with multiple choices:
There are lots of ways to use custom event fields:
- track workflow status
- assign content type
- set deadlines, word count, or other details of the assignment
- move a project or assignment from one stage to another: first draft to revised to final draft to edit to scheduled.
See more ideas for using custom event fields here.
Event comments
You can enable comments on all events by default. Go to Settings > Event Fields, then edit the Comments event field to turn it on for all events by default. You can choose to make event comments to All users or only to Users with modify permission. If you want everyone to be able to use the event comments–regardless of their level of access permission–set it to All users.

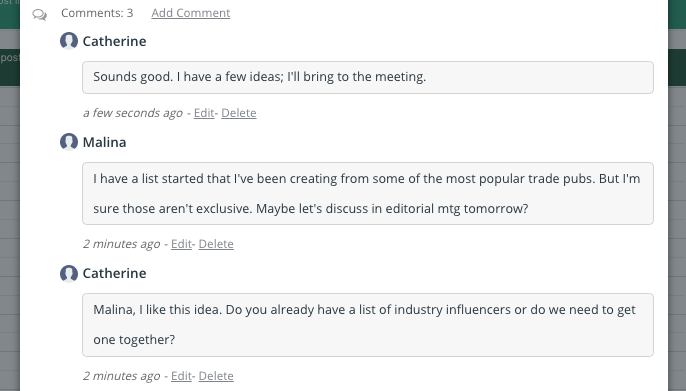
You can use event comments as an internal notes system that can be easily searched, and as a tool for team discussion. Event comments stay with the event, and are automatically time and date stamped. Team members can upload photos or leave detailed notes to event comments. And, of course, they also work as a means of discussion; since they stay with the event, you don’t have to go chasing down your notes or conversations elsewhere. It’s all right there in the calendar:
Read more about using event comments here.
How could a Teamup calendar make it easier for you to manage dual schedules, different team members, assignments, and more? Try out a demo calendar today.


