Last updated Sep 20, 2022
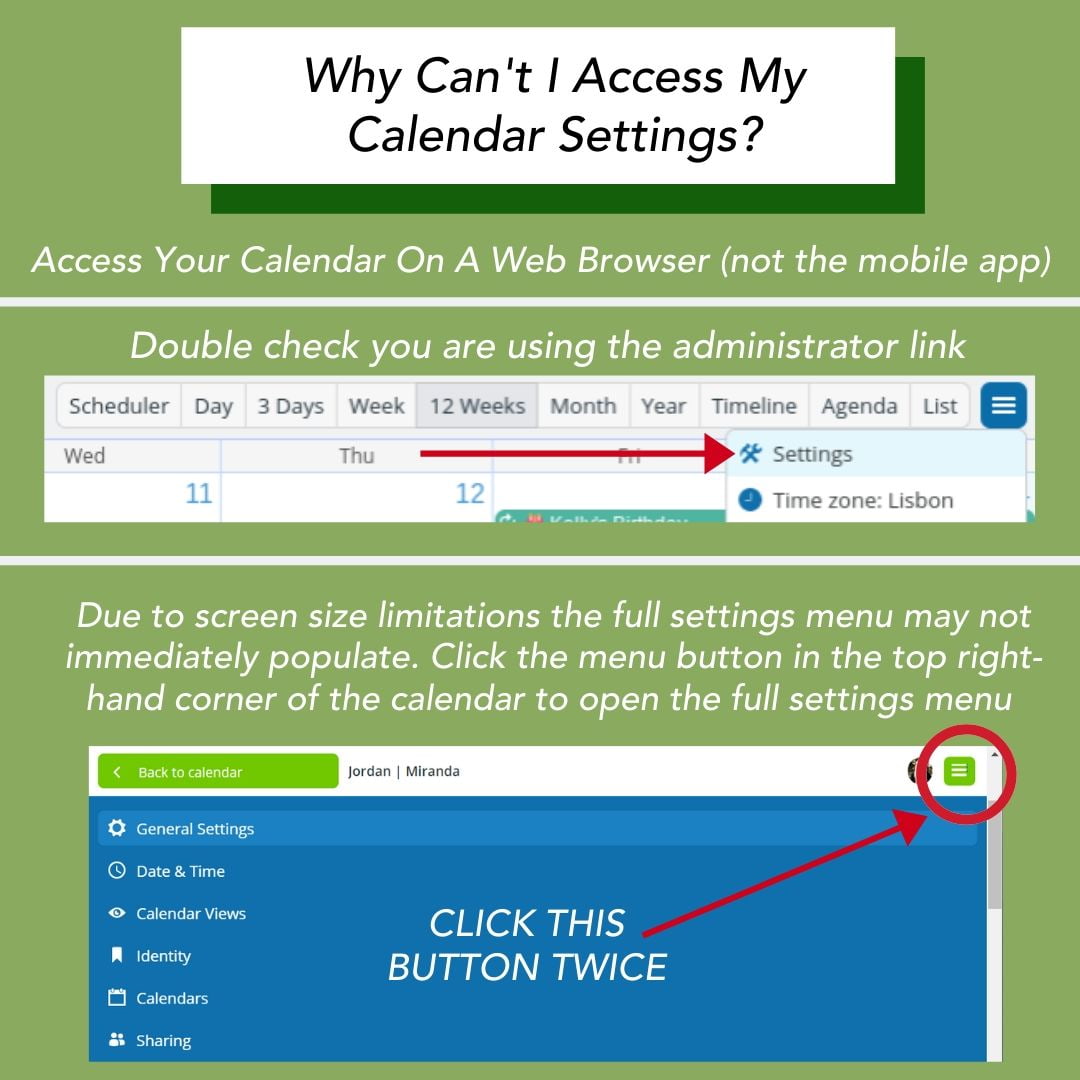
To access your Teamup calendar settings:
- Open your Teamup calendar on a web browser.
- Be sure you are using administrator access.
You cannot access full Teamup calendar settings on the Teamup mobile app.
Access Teamup calendar settings
The Settings on a Teamup Calendar are the “control center” for the calendar. To protect calendar security, the Settings are only accessible to authorized calendar administrators.
To access the Settings, log in to your Teamup user account and open your Teamup calendar:
- Then choose Settings from the blue menu in the top right of the calendar, or
- Click the Add / Edit link beneath the list of sub-calendars, or
- Type /settings to the end of your calendar link in the browser URL bar.
If you are using a smaller screen, the full settings menu may not immediately populate. Click the green menu button in the top right corner of the calendar to open the full settings menu.
When to access Teamup calendar settings
Use the settings in your Teamup calendar to make changes to calendar organization, add or remove users, create or modify shareable links, adjust permission levels for users or links, or change calendar defaults:
- When a new team member joins, go to Settings > Sharing to add that individual as a calendar user.
- Want to share a secure version of your calendar with your community group? Create a read-only shareable link in Settings > Sharing.
- Organize sub-calendars by project, region, or individual. Go to Settings > Calendars to create, remove, or modify sub-calendars, and to organize them in folders.
- An employee has left your organization? Go to Settings > Sharing. Filter the list by Users, then remove that individual as a calendar user.
- Review all notification subscriptions to ensure that calendar data is secure and confidential. Go to Settings > Notifications.

