
Last updated Sep 20, 2022
Let your team see what’s changing on the calendar without ever leaving Slack.
Do you use Slack to communicate with your team? If so, you can integrate your Teamup calendar with your Slack workspace, so you and your team can receive calendar notifications within Slack.
Slack notifications will help your team stay up-to-date on plans and schedules, streamline communication, and reduce the number of emails that you receive each day.
Here’s how to set it up, securely.
Table of Contents
- Keep your calendar secure
- How to set up Slack as a non-admin
- How to set up Slack as a calendar admin
- How to test the integration
- How to manage or end notifications
- Important things to remember
Keep your calendar secure
When setting up Slack notifications in a group channel, security is very important. You need to assign a calendar link with appropriate permissions.Every Slack notification contains the calendar link in it; so anyone who can access the group channel can also find and use the calendar link used to set up the Slack notifications.
If you are a non-admin user, request access to a customized calendar link with appropriate permission settings from your calendar administrator; add this calendar link to your user account. Then proceed with the instructions below.
If you’re an admin, be sure to select or create a calendar link that includes only the sub-calendars — with appropriate permissions for each one — that you want the entire group on Slack to be able to access.
Remember: Everyone who can access the Slack group channel can access the calendar link.
You can also receive notifications about changes on your calendar via your private channel on Slack.
How to set up Slack as a non-admin
Note: ensure that you are logged into your Teamup user account. You cannot access any notification preferences or set up notification subscriptions unless you are logged into your user account.
Step 1: Get an appropriate calendar link.
First, request access to a calendar link with appropriate permissions from your calendar admin.
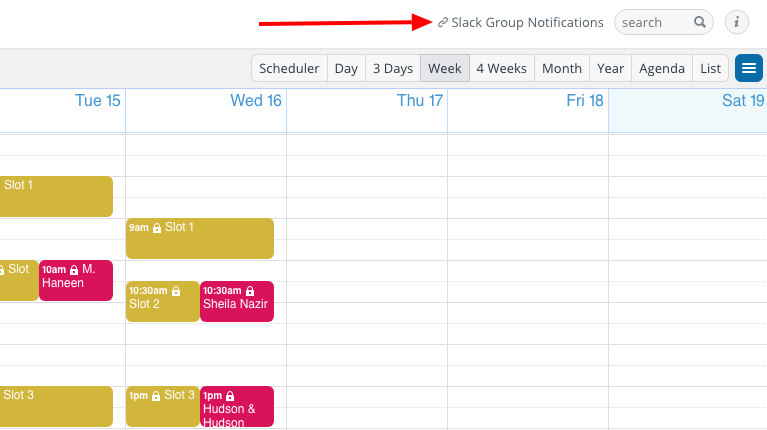
Typically, this link would include only selected sub-calendars that the group is authorized to access, with permissions set to read-only. Ask your calendar administrator to name it something appropriate (e.g., “Slack Group Notifications”) so it’s easy to recognize. Once you have received the link from your calendar admin, open it and add it to your user account.
Step 2: Integrate with Slack
Access your calendar dashboard in a web browser; then open the calendar using the link created for the Slack group channel.
In the menu (top right corner of your calendar), click Preferences > Slack integrations.
Note: If this item is greyed out, the administrator of your calendar has disabled notifications for non-administrator users. You’ll need to contact your calendar administrator and ask them to enable notifications.
Click on the Add to Slack button, and a window will open so you can authorize the integration and set your preferences.
Select your Slack workspace, then select the group channel you’re using to share calendar notifications.
Remember that all posts on Slack will contain a direct calendar link. If you share calendar notifications to a group channel, anyone in the group can use your calendar link.
Once you’ve chosen the Slack workspace and channel, click Authorize to give Teamup permission to post messages to your selected Slack channel.
Now you will be redirected back to Teamup to choose the sub-calendars and events you want to include in your Slack notifications.
Step 3: Set your notification preferences.
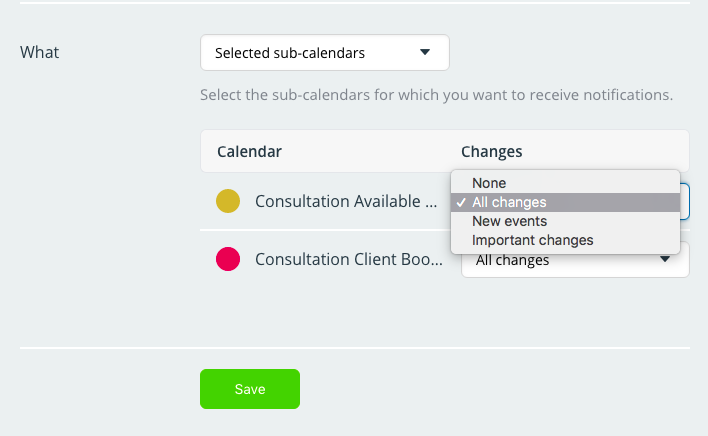
Select the sub-calendars you want to include in notifications in the group channel. Then you’ll choose the type of events. You can select New events, Important changes, or All changes. Click the green Save button once you have set your preferences.
How to set up Slack as a calendar admin
If you’re a calendar administrator and want to set up Slack notifications for a group channel, follow these instructions.
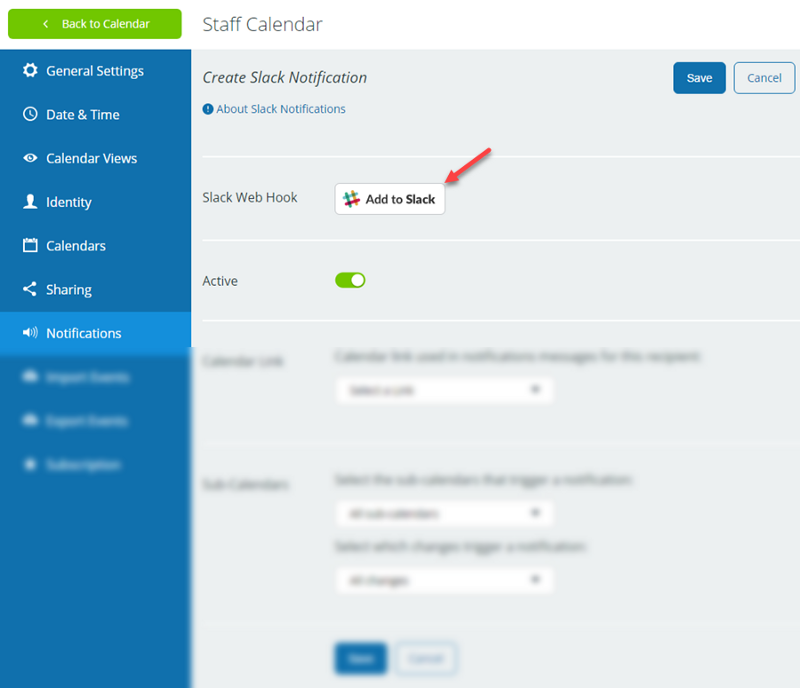
Step 1: Access the settings for Slack notifications
Open your calendar in a web browser with your administrator link. Go to Settings > Notifications. Click the blue New button in the top and choose Slack integration.
Step 2: Obtain Slack authorization
Click the Add to Slack button. This will take you to Slack.com to obtain the necessary authorization. If you try to save before obtaining the authorization, you will be prompted with an error.
Your currently active Slack workspace will show up as the default integration option. If you want to choose a different workspace, simply use the drop-down menu in the top right corner. Only the workspaces you are currently signed into will appear, but there’s also an option to Sign into another workspace.
Once you choose the workspace, there will be a drop-down window with all the eligible channels contained in that workspace. Choose the channel you want to use for calendar notifications.
Step 3: Authorize Teamup to post on Slack
Click the Authorize button to give Teamup permission to post messages to your selected Slack channel.
After authorizing Teamup, you will be redirected back to your Teamup Settings to finish setting up the integration.
Step 4: Select the link, sub-calendar(s), and changes.
Now you’ll choose the calendar link to use for Slack notifications. Select the drop-down menu by Calendar Link to see a list of all available calendar links. Select a link with access permissions that are appropriate for all members of the group channel.
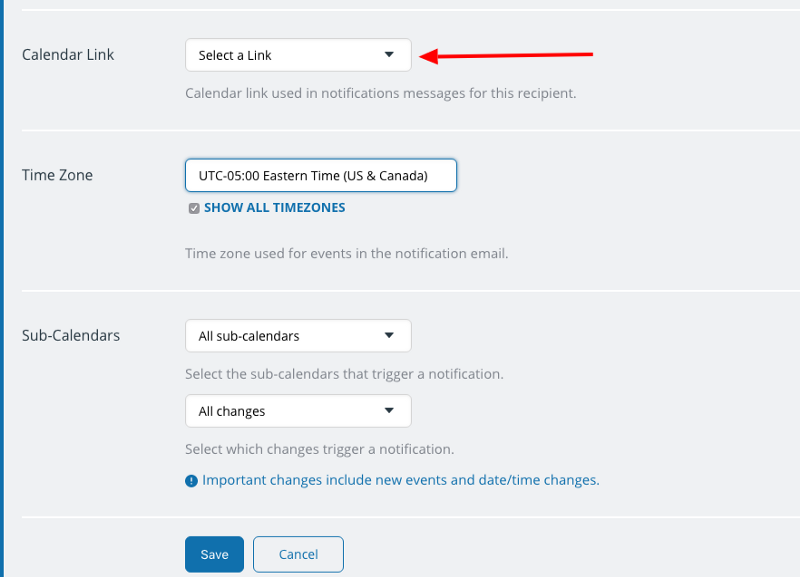
Notifications posted on Slack will contain this link, which members of the channel can click on in order to open the calendar, see more details, or take actions if needed. It is therefore very important to ensure that they are entitled to access the calendar with the permissions assigned to this link.
Once you’ve chosen an appropriate calendar link, you can choose to receive notifications for changes on all sub-calendars or only one or more specific sub-calendars.
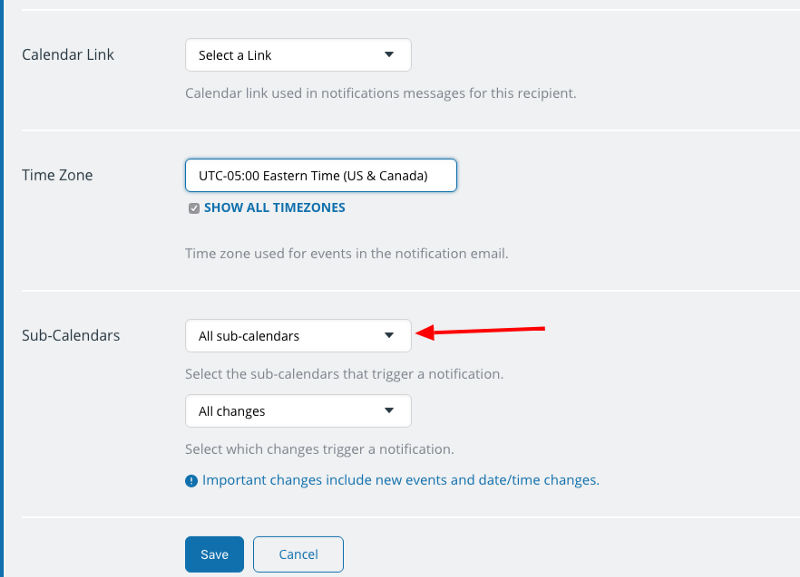
Finally, choose the type of changes you want to include in the notifications: All changes, new events only, or important changes. Important changes include newly created events or time changes of existing events.
When done, click the Save button.
Note that changes of past events will only trigger notifications if the calendar is on a Premium plan.
How to test the integration
To test the Slack integration, simply add, edit or delete a future dated event in your Teamup Calendar and wait for the post from Teamup to appear in the Slack channel you have chosen. It should happen within about 60 seconds.
Be sure you test your notifications with an event you’ve allowed in your Slack channel; for example, if you chose to show “New events only,” then you need to create a new event to receive a notification in Slack, since modifying an event that already exists won’t appear in your notifications on this setting.
From the Slack notification, click on the calendar name to open your Teamup Calendar. Check that the correct link has been used. In particular, be sure that it is not a link with the administrator rights or other inappropriate modifying permissions.
How to manage or end notifications
You may need to remove Slack integrations from your calendar for various reasons, including:
- You no longer need a Slack integration for any group channels.
- You have accidentally set up duplicate integrations and want to remove one or more.
- Any employees who have previously setup a Slack integration to post notifications to their private channels but have now left your organization.
Non-admins can remove a Slack integration easily. From the Slack app, go to the app directory and delete the integration with Teamup Calendar.
For calendar administrators, there are two steps to remove Slack integrations:
The admin must also remove the integration from slack as listed in point 4. Actually it’s not an alternative, but a must step. Otherwise Slack keeps the calendar link which would come back “live” if someone uses a slack command (a reason that we are not mentioning the slack command thing now as we haven’t fully understood which links are kept on slack and from which calendar link/how the command gets the events to display).
- From the administrator link, go to Settings > Notifications. You will see an overview of all existing notifications that have been set up by all users of the calendar (including the administrator and non-administrators). From this screen, you can manage all notifications:
- You can toggle a Slack integration off using the button on the left side of the notification listing.
- Or you can delete or edit a Slack integration. Click the edit button on the right side of the notification listing. From there, you can duplicate, delete, or modify the Slack integration as you wish.
- Remove the integration from the Slack app: go to the app directory and delete the integration with Teamup Calendar.
Important things to remember
- Granting access to Slack notifications is granting access to your calendar. You can limit and control the calendar access granted by using an appropriate calendar link and sharing it with the right people.
- Remember that all posts on Slack will contain the calendar link from which you are setting up the notifications. If you share calendar notifications to a group channel, anyone in the group can use your calendar link.
- In most cases, it is recommended to create a customized link specifically for the members of this Slack channel, unless an existing link is appropriate for the channel.
- It’s a good idea to create a designated Slack channel solely for calendar notifications, and make it a private, invite-only channel. That way you can control who sees the calendar notifications and can access the calendar. If you already have a public channel you want to use, you can convert it to a private one.
You can find more information about posting notifications to a Slack group channel here.