
Last updated Sep 20, 2022
Use event signups to get an accurate headcount, set a limit on the number of participants, and collect participant information for follow-up. It’s easy.
Event signups are a built-in, powerful feature available at all subscription levels. If signups are enabled, people can sign up for an event with their name and/or email address. The event organizer(s) can easily see who has signed up.
Table of Contents
- How to enable signups
- Organize events and prevent duplicate signups
- Promote events and manage participants
- Gather and export participant information
How to enable signups
Enabling signups on events is a quick process.
On a browser: open any event, click the Options button, and choose Signups. In the dialog window that opens, toggle Event Signups to enabled.
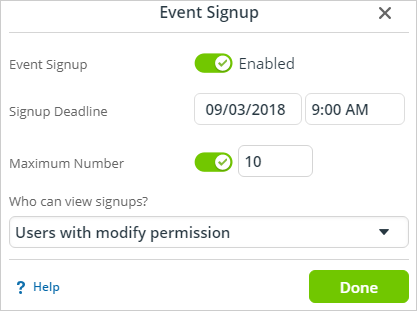
You can adjust the signup deadline and set a maximum number of signups permitted. Choose who can see the signups (All users or Users with modify permission). Click the Done button, then Save the event.
🔗 Learn more: Signup for an Event
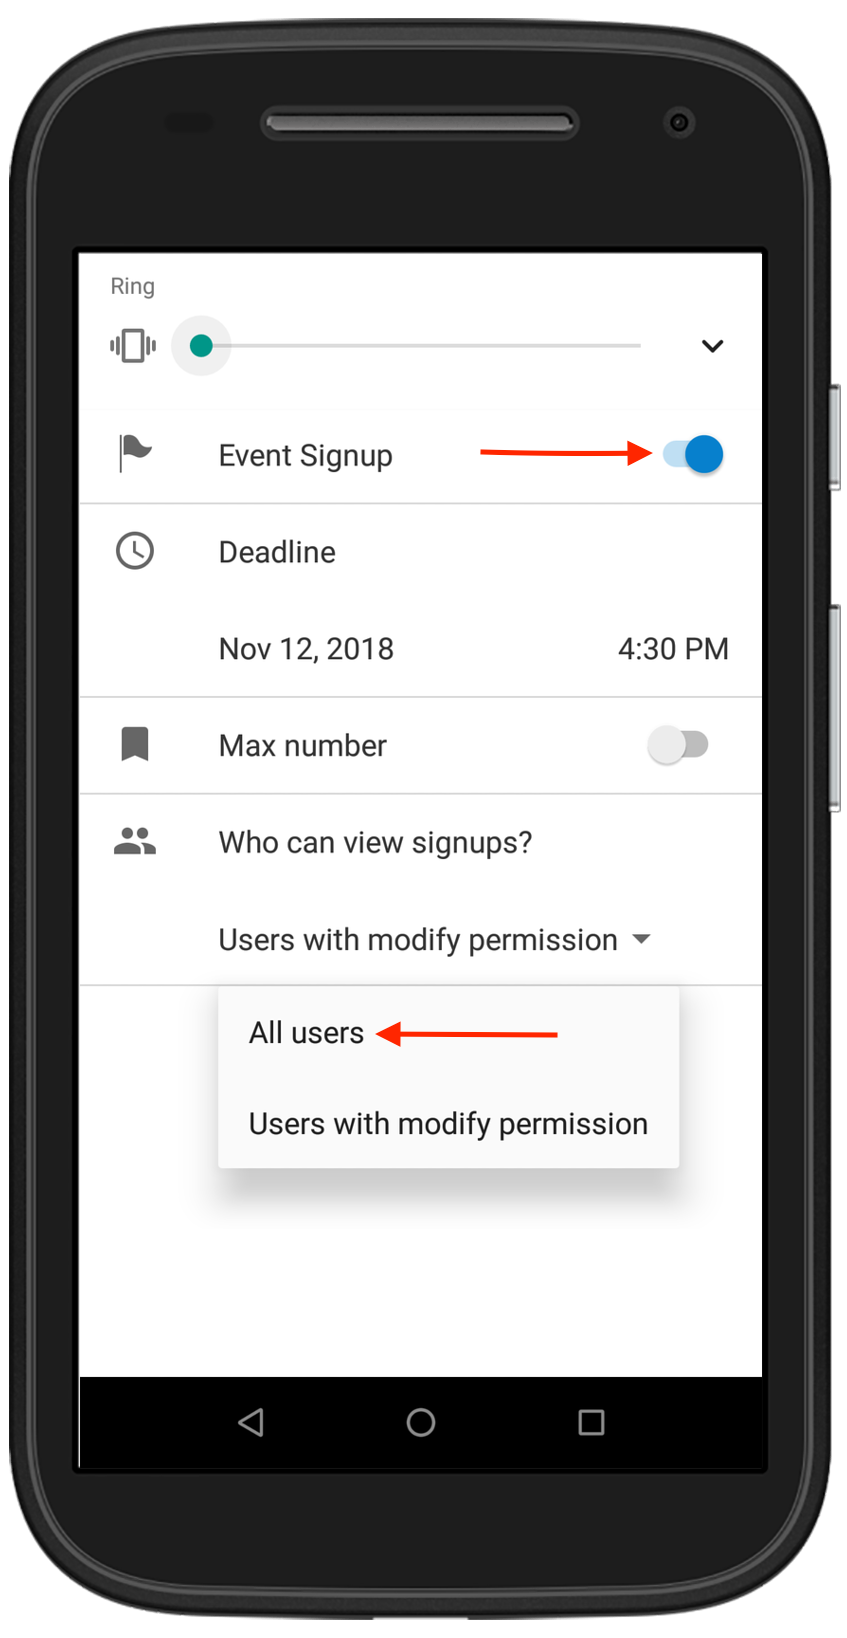
On the Teamup mobile apps: open the event and tap Edit in the top right corner. Tap the gear icon to access the event options, and select Signup. Toggle on Event Signup, then set the options as desired.
🔗 Learn more: Event Signups on Mobile
When choosing who can view event signups, you can choose between All users or Users with modify permission. If you choose All users, email addresses of participants will be automatically hidden on the signup list, which will show at the bottom of the event editor/viewer, and on the event page.
1. Organize community events and prevent duplicate signups.
Many organizations and groups use Teamup for community calendars. Some of these calendars are available only to group members, and some are public-facing. In many cases, multiple organizations share a calendar so that community members can see all the area events in one place.
The signup feature makes it easier for event organizers to get an accurate idea of interest or limit the number of participants.
Enable Signup on any event, set a deadline, and set a maximum number if space is limited. Or, if you have plenty of room but want to have a headcount in order to prepare adequate materials, food, or other supplies, don’t set a maximum number but do require a deadline.
Participants can enter a name, an email address, or both to signup for an event. In order to prevent duplicate signups, the email address must be unique. If only a name is used, the name must be unique.
🔗 How to Easily Share a Community Calendar Using Teamup
2. Promote events and manage the number of participants.
Many Teamup users have found that their Teamup calendar works well as a simple booking system for workshops, classes, seminars, and training sessions. In most of these scenarios, it’s important to know how many people want to participate. In many cases, it’s key to be able to limit the number of participants per event.
Create the event for your workshop or class, then enable Signups and set the deadline, giving yourself enough time to make arrangements or adjust logistics as needed. Then, if needed, set the maximum number to limit signups to what you can accommodate.
Easily promote your workshop by sharing the event as a page across all your social media platforms or to an email list.

Interested people can signup from the event page, and you can get notifications when anyone signups. Set up your Notifications to include ‘All changes’ to receive an email when someone signs up.
🔗 Small but Useful: Display Signup Deadline on Event Page
3. Gather and export participant contact information.
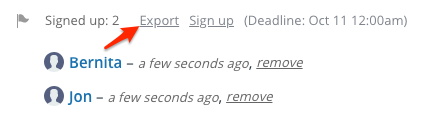
If you host an event and want to communicate with the participants afterward, you can do so with the information gathered via the event signups. As the event organizer, you can always see a list of event signups on the event itself. You can also export signups from an individual event. Scroll to the list of signups on the event, then click the Export link:
You can also export signup information from all or some of your sub-calendars. To do so, go to Settings > Export Events. In the Export Format, choose Comma Separated Values (.csv). Scroll to Advanced Options and click Show. Check the box to Export signups instead of events. Choose the calendars and date range as desired, then click Export.
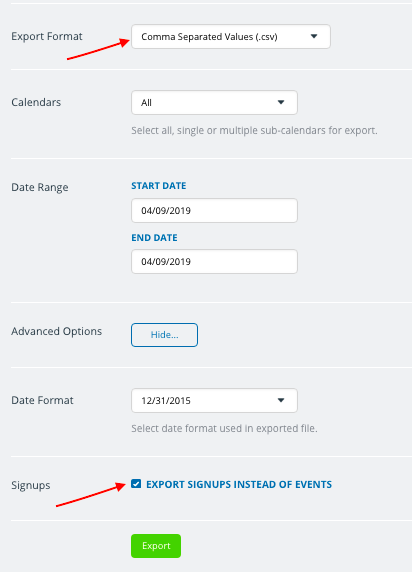
The signup information will download in standard .csv format, so you can easily sort and work with it as needed.
If event signups work well for you, you can enable them by default so that all events will automatically have signups enabled. You can override this global setting on individual events. To enable event signups globally, go to Settings > Event Fields. Click the Edit icon on the Signups event field. Scroll to the Defaults section. Choose the options you want for default Signup settings.
If you don’t have a Teamup calendar yet, you can create your own now (it’s free!) or try out a live demo calendar to see how it all works.
Header Photo by Vanilla Bear Films on Unsplash