Last updated May 31, 2024
Did you know you can configure the built-in event fields on your Teamup calendar so they’re more useful to you? Label, arrange, and set defaults for these built-in fields so they make more sense for the way you use your calendar. You can add additional custom fields, too, to tailor your calendar further. Check out these tips for customizing those built-in fields to be more useful for your needs.
How to makeover the default event fields
When you create a Teamup Calendar, it comes with certain default event fields. But you don’t have to leave these fields the way they are. You can configure them so they make more sense for the way you’ll use the calendar. It’s just one of the many ways you can customize Teamup to be more truly yours.

What are the default event fields?
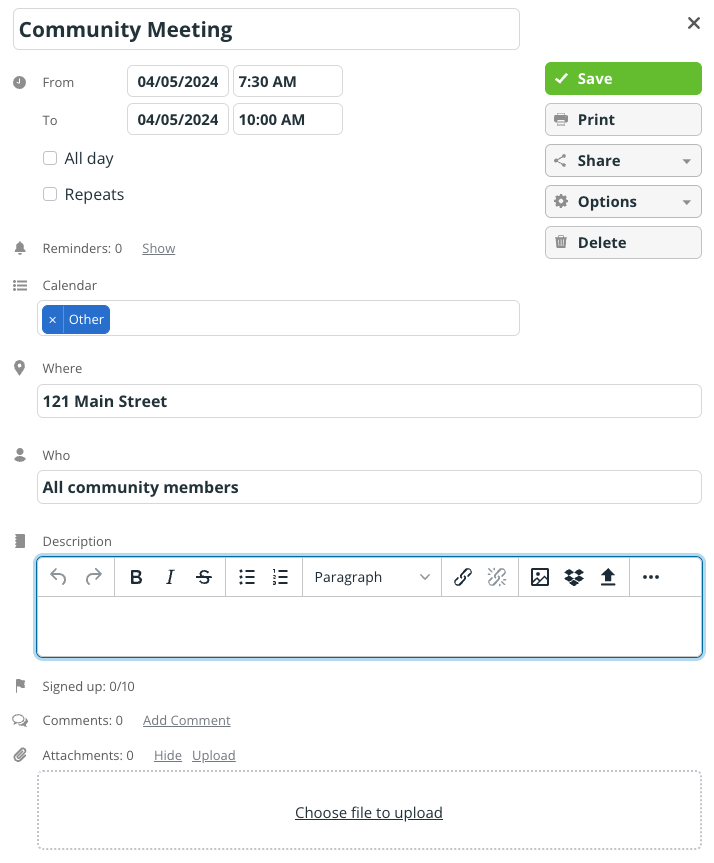
The default fields include the Title, Calendar, Who, Where, and the event Description. Plus, there are built-in fields for Signups, Comments, and Attachments. These are all standard and included on any Teamup Calendar, even on the Basic (free) plan.
Review, assess, and make them yours

Apply the same concept to these default fields on your Teamup Calendar. They’re created with a purpose in mind; but you can repurpose them for your needs. And it’s easy to do. Here are the ways you can makeover these built-in fields to be more useful.
Rename any default field
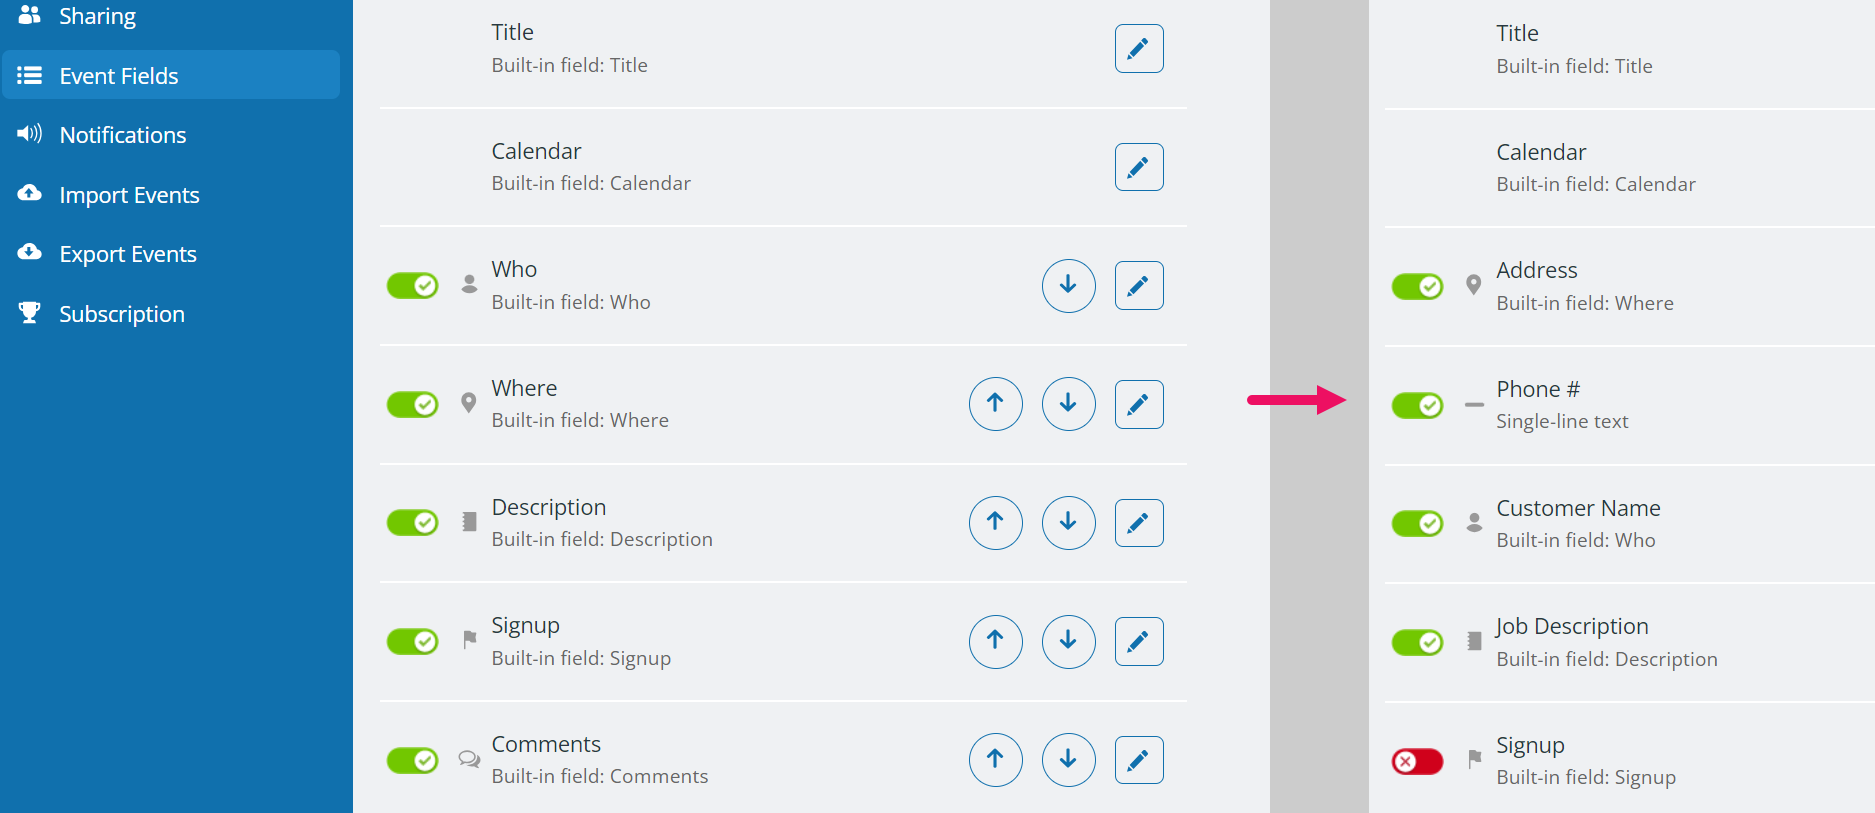
Make the label more specific; for example, rename the Who field to Event Organizer. Or label a field something entirely different that’s suited to your purpose for the calendar; the Description field could become Call Notes or Journal Entry.
Rearrange event fields
You can rearrange fields to make sense for your needs: most important to least important, required to not required, most used to least used. Think of how you process data on your calendar, and arrange the fields to match.
Note that the Calendar field and Title field have configuration limits: they can’t be deactivated or rearranged.
Deactivate event fields
If you won’t use a particular field, you can deactivate it to keep your calendar uncluttered.
Make fields required
If a certain field is necessary, you can prevent events from being created without it. Just check the Yes button in the Required section. Calendar users will not be able to create a new event unless the required field(s) is completed. This can be very helpful if you want to ensure that certain details are always added to events. For example, perhaps the location is necessary for all events added to your calendar: Make the Where field required. Or if multiple people use the same calendar link, you could make the Who field required as a way to track who “owns” each event.
Show fields in the event title
For several of the default fields, you can choose whether the field information shows in the event title. If you want to see certain information at a glance, make it show in the event title.
Set defaults for signups and comments
The event signups and event comments have a few default settings you can adjust. It’s helpful to set these for the way you’ll most commonly use the signups or comments. You can override these defaults on any individual event.
The best way to learn is do: Jump into a live demo calendar and try configuring event fields yourself. Making a few adjustments can make a huge difference. When your calendar is customized for your needs, it’s more efficient and more fun to use.


