
Last updated Feb 22, 2024
Teachers need an efficient and reliable way to manage the information that goes into each lesson. With Teamup, teachers can do lesson planning, upload documents directly to the calendar, and manage material sharing with students. They can also keep lesson drafts and internal notes on the calendar, answer student or parent questions, and keep regularly used resources easy to access. Let’s take a look at how it works.
Setting up the calendar
To set up the calendar for use by teachers, the calendar administrator can assign sub-calendars for each grade, class, or teacher according to what works best for the school. Sub-calendars can be organized in folders. One sub-calendar can be created for lesson drafts and internal notes, and made accessible only to teachers and school staff, as needed. Each teacher should be given the Modify-my-events no details access level to this sub-calendar, so they’ll be able to see only their own lesson drafts and notes. Events created by other teachers will appear with “Reserved” as the event title, and will not show event details.
If the class schedule is readily available in a .csv file, it can be imported to Teamup. And, for important details, it’s easy to create choice, text-entry, or numerical custom fields.
Easier lesson planning for teachers
Lesson planning can pull from many resources. As a teacher, you can use all the features built into Teamup to make the process more efficient and keep track of all the links, materials, and notes as you develop the lesson plan. Then, once it’s completed, simple move the lesson from the Draft calendar to the appropriate Class sub-calendar.

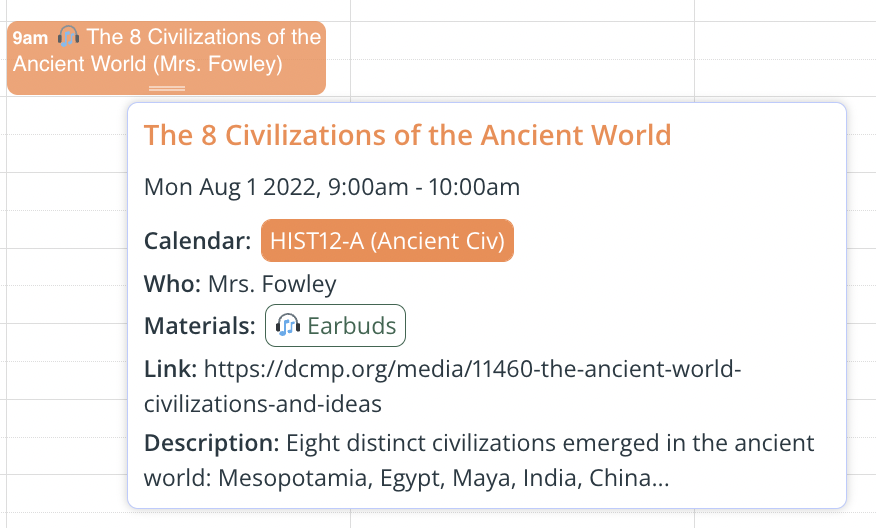
Creating a lesson
- Keep lesson drafts private until ready to share. With permissions set as described above, only the teacher who created the lesson will be able to see the details. Other teachers using the calendar will only see the the event marked as Reserved. Students (and parents) won’t have access to the Drafts sub-calendar at all.
- Upload lesson materials to the calendar. Keep all the images, files, or documents relevant to the lesson right there–no need to send an email with attachments or send students to a file repository. You can make uploaded images visible in the event or show them as clickable links.
- Include details, assignments, and more. The Description field is a fully functional text editor. You can even expand it to full-screen so it’s easier to work on lesson content and adjust formatting.
- Add clickable links. Copy and paste resource links into event fields and they’ll automatically be clickable.
- Keep notes in event comments. As you work on your lesson plan, you can keep notes in the event comments to ensure you cover all the points. Once the lesson is finished, you can delete your comments if no longer needed.
Sharing with students
When completed, move the completed lesson plan from the Draft sub-calendar to the relevant Class sub-calendar. Now it will be visible to the students who are in the class.
Once a lesson is published, students can access it on the calendar to read the content, see assignment details, and access the materials. You can even use the comments to take questions and have discussions right on the calendar. And if you need to update the lesson, everyone see the most recent version on the calendar.
Learn more about lesson planning and material sharing from the Canton de Vaud case study. Or try out a live demo and see what Teamup could do for you!