
Allow people or groups to add events directly to a calendar for less administrative work.
Many people love using Teamup to allow others to contribute to a shared calendar. It’s less work for the calendar administrator (always a bonus).
Without Teamup, allowing others to add events to a calendar can be complex and risky. Granting full access to a calendar — so others can add events to it — risks data loss. What if someone accidentally deletes an event?
The alternative is to use a hodgepodge system of emails, messaging, and collecting information via a form or spreadsheet. The calendar administrator still ends up having to manually input all the even information; the workload is increased, rather than decreased.
By sharing calendars securely — with controlled, customized permissions — you avoid the back-and-forth, tedious process of collecting information and transferring that information to a calendar. All the calendar administrator has to do is review the events that people create, and make them visible to others as desired.
Here are a few scenarios where enabling multiple people or groups to add events to a calendar would be helpful:
- When managing content, you could allow members of the editorial team add content ideas, scheduled interviews, and industry events to the calendar.
- For community calendars, different community groups and organizations can add their events to the shared calendar.
- In a team environment, members could request meetings, or note when they are “out of the office” on the calendar.
- Nonprofit organizations can allow volunteers to add various tasks or needs related to an outreach or event.
- A small business, or a department in a large corporation, could allow staff to request time off via the calendar.
These scenarios are easy to manage with a Teamup Calendar. You’ll still want to maintain some sort of control over the process. With the ‘Add-only’ and ‘Add-only, no details’ permissions, you can essentially use a Teamup Calendar as a pending event system.
Set Up a Sub-Calendar
First, add a sub-calendar for event submissions, meeting requests, appointments, and other items you want people to create on your calendar. It could be called ‘Event Submissions’ or ‘Pending Appointments’ — whatever makes sense for your use.

Choose the Right Permission
Next, decide whether to give calendar access through account-based users or with customized shareable calendar links.
In this post, we’ll focus primarily on how you could use a customized, shareable calendar link to allow others to safely add events to a shared or public calendar. If you are setting up a calendar for internal organizational use, we recommend using account-based user access. Learn more here.
First, create a link for the sub-calendar. You’ll want to customize the link so you’re sharing only your calendar for event submissions, with Add-only or Add-only, no-details permission.
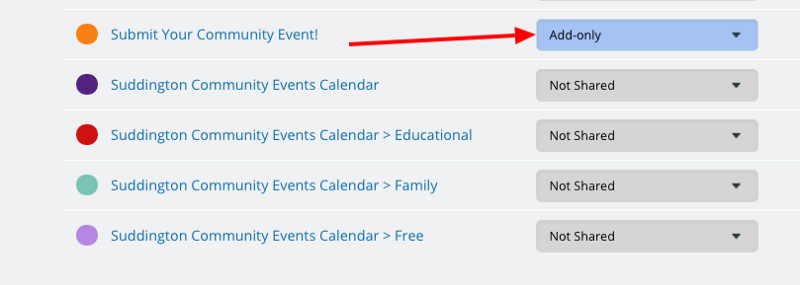
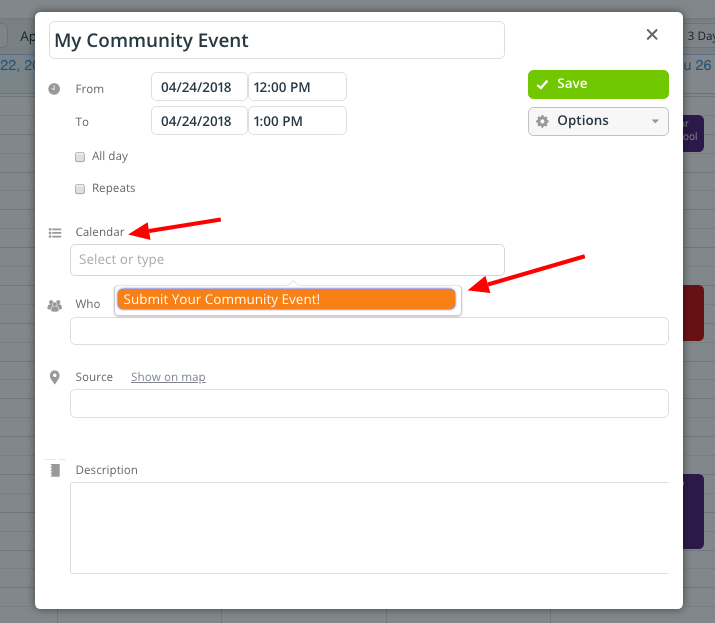
The add-only permission enables users to open the shared sub-calendar, click on the calendar to add an event, enter the event details, and save the event. They can also see other events that have been added to the calendar, including details (such as description and location) but can not edit them.
Take a closer look at sharing and setting permissions.
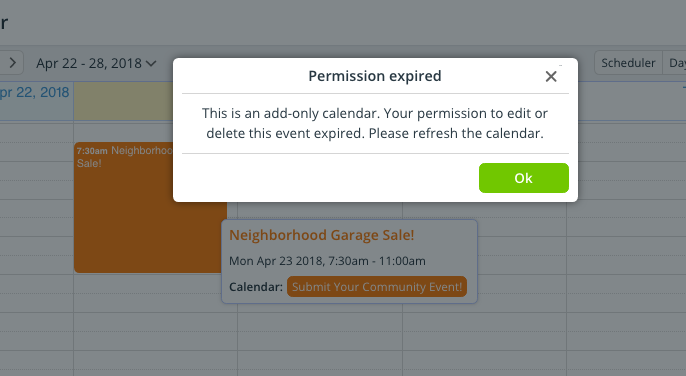
By setting limited permissions, you reduce the risk of data loss or sharing information that’s sensitive. The people who use this link will only be able to add events to the shared sub-calendar, and edit the event they create within about 30 minutes from the same browser or device. If they try to edit an event after that time has elapsed, they’ll receive a message:
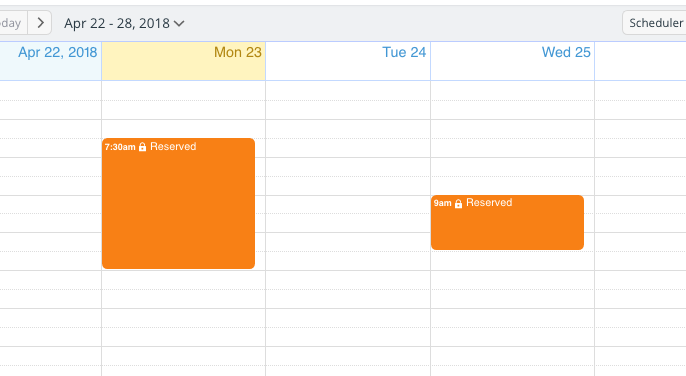
The Add-only, no-details permission does not allow a user to see the titles or details of other events. They will merely see other slots as Reserved.
Make It Work for You
There are many ways you can adjust this concept to make it work for your particular use.
Add more calendars
What if someone needs to see what else has been scheduled, as a reference point when they add their own event? That’s easy, too. You can adjust the link to allow read-only access to any related sub-calendars.
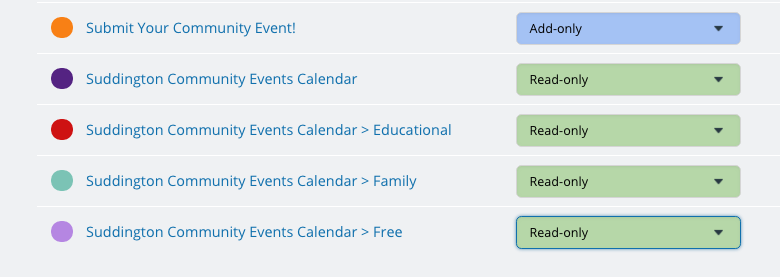
A person with the link above can see all calendars, but can only add events to the event submission sub-calendar.
When someone with this link adds an event to the calendar, they’ll only be able to put their event on the event submission calendar. Since it’s the only calendar with add-only permission, it’s the only one that will show up and can be selected in the event editor.
Let users modify events
If you want to allow someone to edit the event they submitted any time later from any browser or device, you can create a link for that specific user (or group) and give it a modify-from-same-link permission.
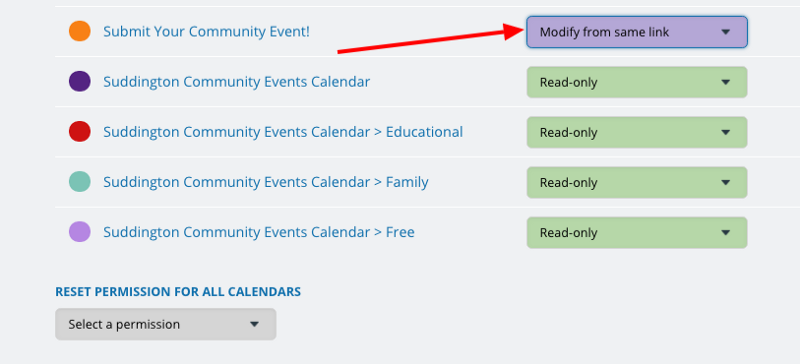
If you’re working with a specific community group, for example, that often creates recurring events and needs to update details and locations, you could create a specific link, like the one above. They can access the calendar, create their events, and modify events as needed from that link.
Use customized event fields
You can also customize event fields to get the right information for events that are submitted.
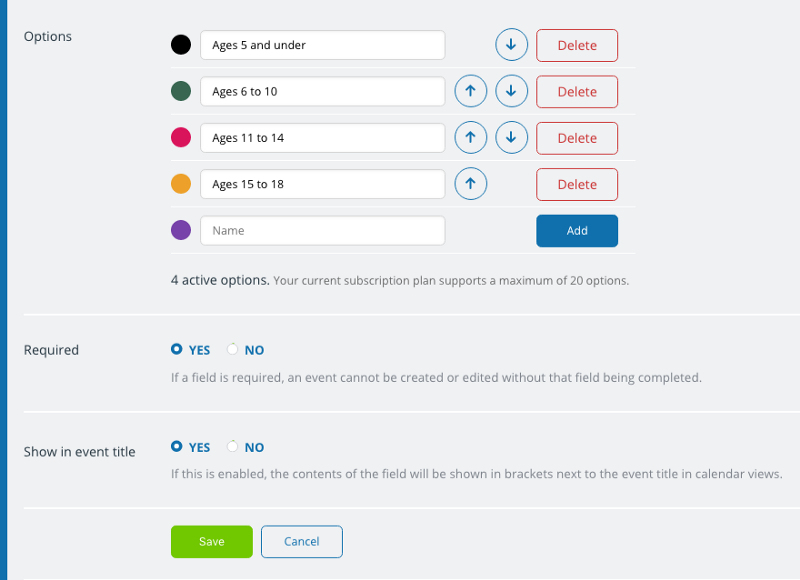
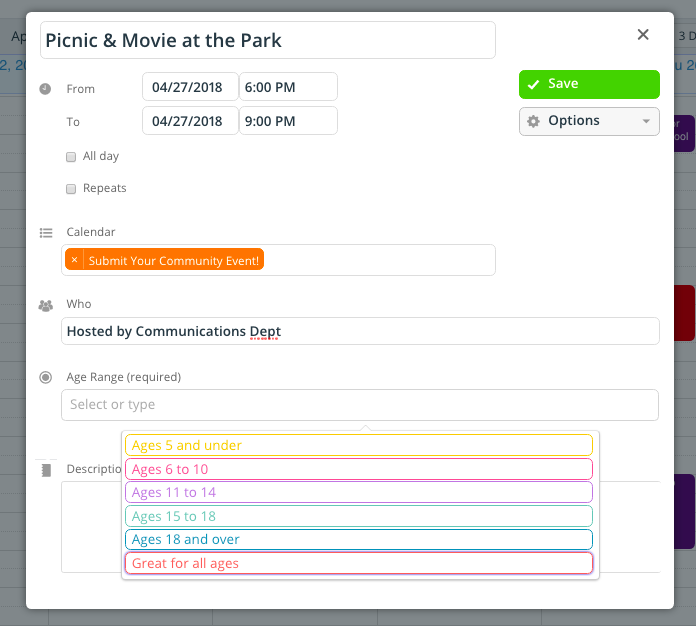
To customize event fields, go to Settings > Event Fields. Then click on the +New Field button in the top right. You can name the event field and make it single-line text entry or insert choices. You can also make it required, and choose to have it show in the event title, if desired.
Here’s how the event field above would look for someone adding an event:
Approve and Move Submitted Events
As the calendar administrator, you can log in and see all events that have been added to the calendar. You can also set up email notifications, if desired.
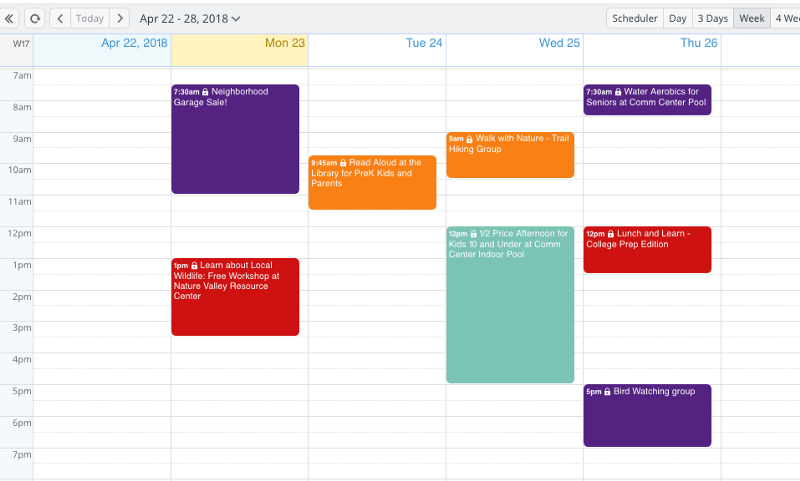
Use Scheduler view to easily work with events that have been submitted. Simply drag an approved event from the Event Submission calendar to the correct sub-calendar.
How much work could you save without having to manually add all those events from a spreadsheet, or track them down in emails? Try it out and see how it could work for you with our live demo calendar.