Last updated Sep 20, 2022
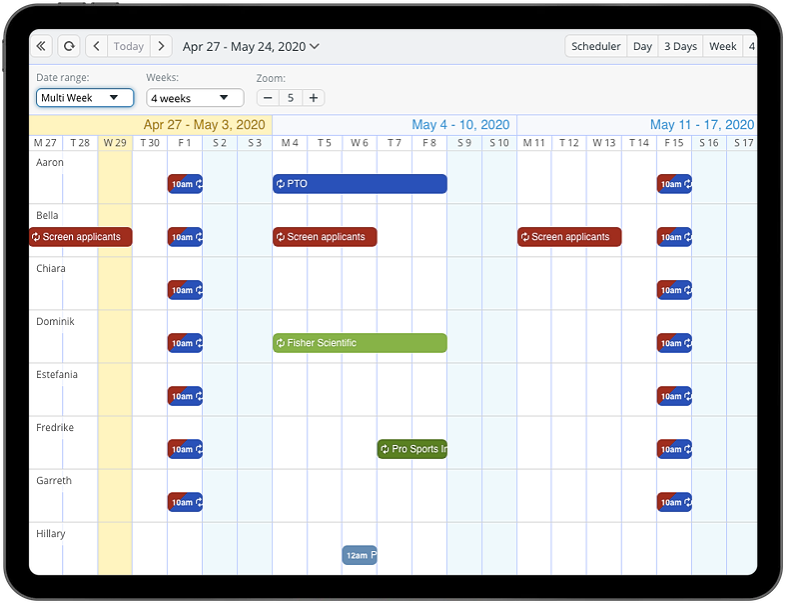
Teamup calendar has multiple calendar views available. The Timeline view is unlike any other calendar views: it displays the time horizontally, and shows the events for each sub-calendar in its own row.
Timeline view can also be configured to show a single day, multiple days, one week, or multiple weeks.
You can also set the default zoom level so the view best fits your screen.
Note that the timeline view is not available on the Teamup mobile apps. Teamup mobile apps (available for iOS and Android) support four calendar views: List, Day, Week, and Month.
Configure the options for Timeline view
To configure the options for timeline view, you’ll need administrator access to your calendar.
- Go to Settings > Calendar Views.
- Scroll down to the Timeline view section.
- Set the default date range and default zoom level.
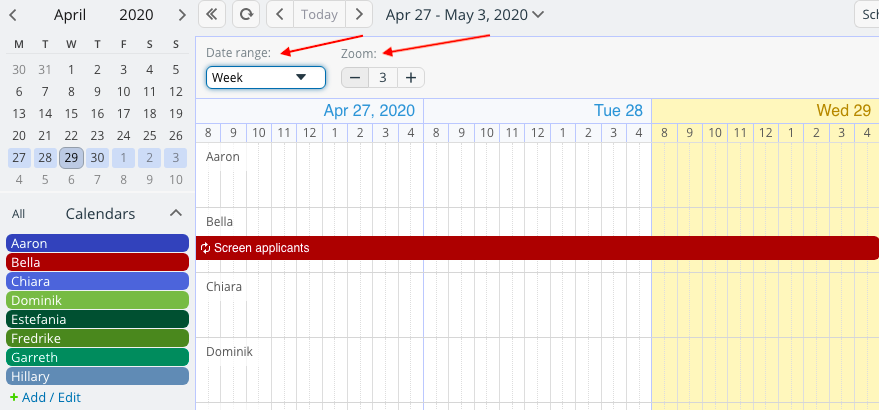
You can adjust the date range and zoom level anytime while using Timeline view.
Use the Date range and Zoom menus that sit directly above the calendar: 
The multi-day option in Timeline can be set to show from 1 day to 21 days.
The multi-week option is a bit like the monthly calendar view, in that it does not have a time grid. The lowest resolution is one day. This makes it much faster and easier to use for longer date ranges than other views with a time grid. The number of weeks are configurable; you can set it to show up to 30 weeks. Learn more about Timeline view →

