Last updated Jun 20, 2024
If you manage projects for yourself, with your team, or for clients, you may find your calendar needs changing. For example, you may have a complex project that requires a lot of calendar space… But once the project is over, you want to clear it off your calendar. You may also want to share events related to the project with your team or client, but not share the rest of your calendar. Teamup can help in all these situations.
Add sub-calendars for projects
Since you can add, modify, activate or deactivate sub-calendars at any time, it’s easy to create a sub-calendar for a specific project. Then you can keep all events and tasks on the dedicated sub-calendar. Your other sub-calendars will not be cluttered by project-related tasks and events.
Let clients access a single sub-calendar
You can also give limited access. For example, if you are managing a project for a client, you can give your client access to the project sub-calendar only. Create a calendar link for your client, and assign that link access to the project sub-calendar only. Your client will not be able to see your other sub-calendars. See this detailed article on setting up customized permissions in this manner.
These links can be one per person or for a group of people. If you need to allow a group to access a project calendar, you can create a calendar link for each group member, or share one calendar link with an entire group. Teamup’s Basic (free) plan includes up to 50 of these shareable calendar links.
Give limited calendar access to your team
If you are working with a team, we recommend giving calendar access with a user account.
- Add your team members as account users (see here for details).
- Then, for each team member, assign access to the sub-calendar(s) they need to do their job.
You can adjust calendar access for each user, as needed. So if Sam, a team member, is involved in Project Z and Project B, give Sam access to those sub-calendars. Linda, who is working on Project A and Project X, gets access to those sub-calendars. In this way, each team member accesses only the calendars they need for their roles.
Archive calendar data
When the project is over, deactivate the project sub-calendar(s). Deactivated sub-calendars retain their data; it’s just not visible or accessible until the sub-calendar is reactivated. So, you can use a deactivated sub-calendar as an archive for that project’s calendar data. If you need to access it again, reactivate the sub-calendar.
You can use this archival method for other things besides projects:
- An employee leaves the organization. Revoke their calendar access, then deactivate their dedicated sub-calendar. You can activate it again to review or export the data if needed.
- A regional office closes. Move all events and tasks from that office to a single sub-calendar (or group of sub-calendars), then deactivate those sub-calendars.
It’s a good idea to be specific when you name an archival sub-calendar (e.g. “Archive: XYZ Employee”) so it’s easy to identify what data it contains and prevent accidental deletion.
Deactivated sub-calendars don’t count against your subscription’s calendar limit. Only active sub-calendars do. You can often stay on a lower subscription level by keeping a shorter list of active calendars. Archive out-dated/non-current sub-calendars by deactivating them, and only keep the ones you are currently using active.
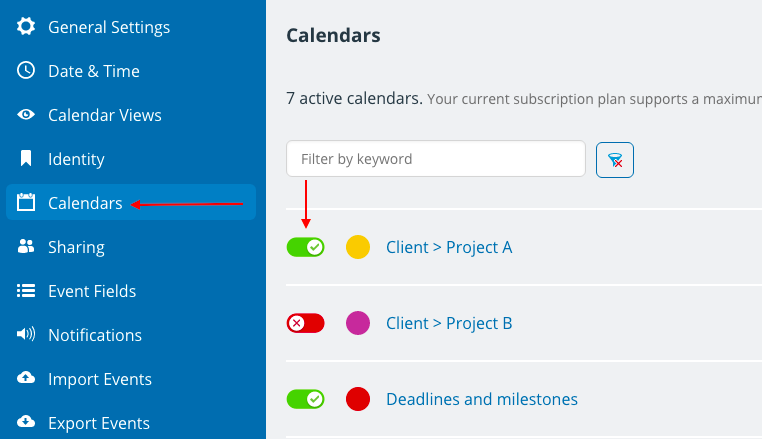
To deactivate a sub-calendar, go to Settings > Calendars, then use the toggle to the left of the calendar name to deactivate (red) or activate (green):
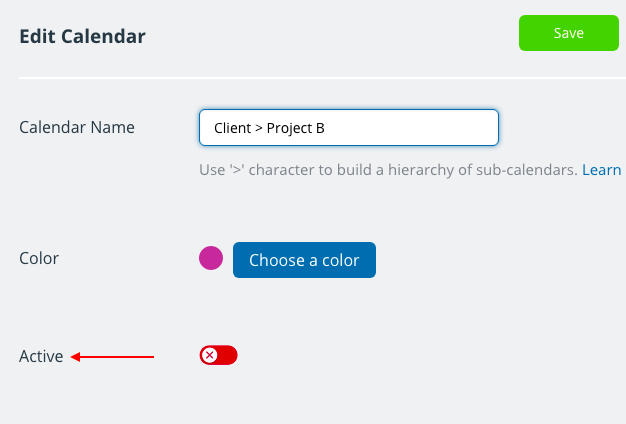
You can also click the Edit icon next to a sub-calendar and use the toggle in the Active section:


