
Last updated Sep 20, 2022
Want to embed your calendar on your blog or website or social media? It’s a great way to share events and coordinate schedules. With the new Teamup embedding tool, it’s easier than ever.
Table of Contents
- Meet the Teamup embed wizard
- Grab your calendar link
- Open the Teamup embed wizard
- Adjust the appearance and settings
- Copy and use the iFrame code or URL
Meet the Teamup embed wizard
Embedding a Teamup calendar has been possible for a long time, but the new embed wizard makes it easier than ever. It’s a WYSIWYG (What You See Is What You Get) style editor, with a toolbar for making visual adjustments. You can set up the embedded calendar just as you want it, then copy the code and insert it anywhere. The embed wizard will generate both iFrame code and a URL for the calendar you wish to embed.
Here’s the new Teamup embed wizard. Read on to learn how it works.
Grab your calendar link
First, you need to get a calendar link to use for the embedded calendar. Make sure it is a link with an appropriate access permission. In most cases, this will be the read-only or read-only, no details access level. However, if you wish to use your embedded calendar to allow users to make bookings or reserve spaces, meetings, or resources, you would probably use add-only or add-only, no details access level.
Never use your administrator link to create an embedded calendar. This is a major security breach and will allow unauthorized access to all of your calendar settings.
To create a unique calendar link for your embedded calendar, access your calendar settings. Go to Sharing and click the + New Link button in the top right. Name the link so you’ll remember which one it is (“Embedded Calendar” or “Public Calendar,” for example). Then choose which sub-calendars to include: All or Selected. Set the level of access permission. If you include All calendars, you can set the access permission globally. If you choose Selected calendars, you will need to set the level of access permission for each sub-calendar.
Save the new calendar link, then click the Copy icon under the link name. This will copy the calendar link to your clipboard.
Open the Teamup embed wizard
To access the Teamup embedding tool, go to Teamup.com/embed. A pop-up window will ask for your calendar link. Paste in the calendar link you just copied:
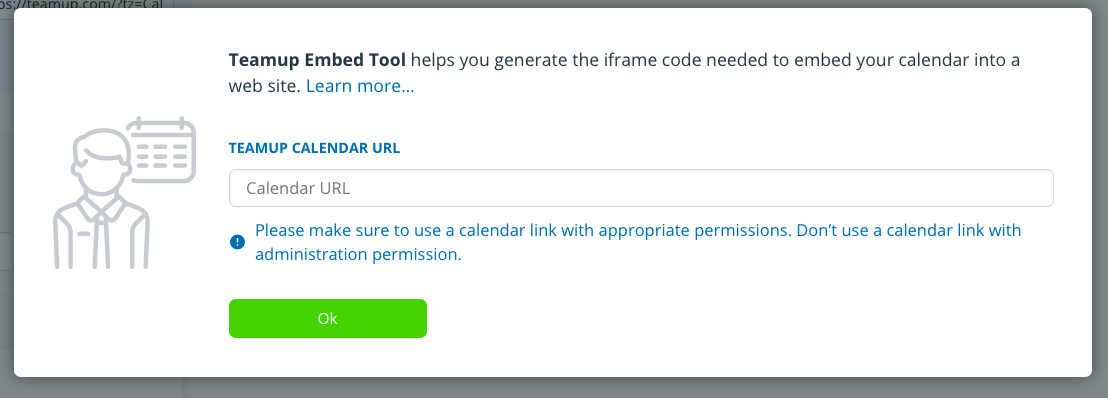
If you realize that you used the wrong calendar link, no problem. You can edit the link. At the top of the screen, you’ll see the calendar link you are using. Click the Edit icon to change the link.

Adjust the appearance and settings
Once you input your calendar link, the calendar will appear on the right. On the left is a panel of options. You can adjust the options to customize your embedded calendar. The iFrame code will update automatically.
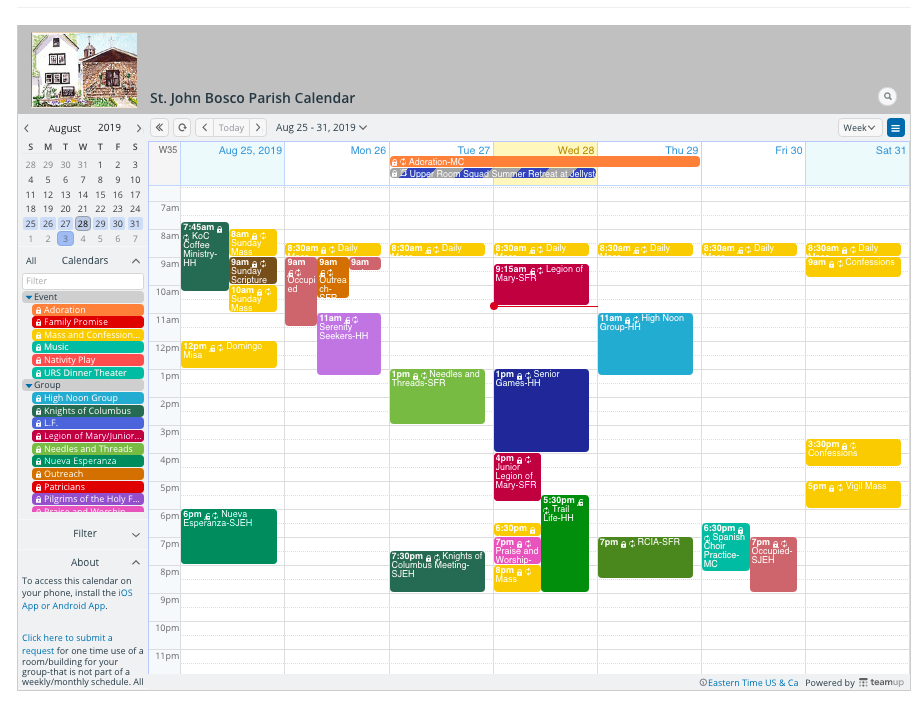
Here’s an example of a Teamup calendar embedded on a Facebook page:

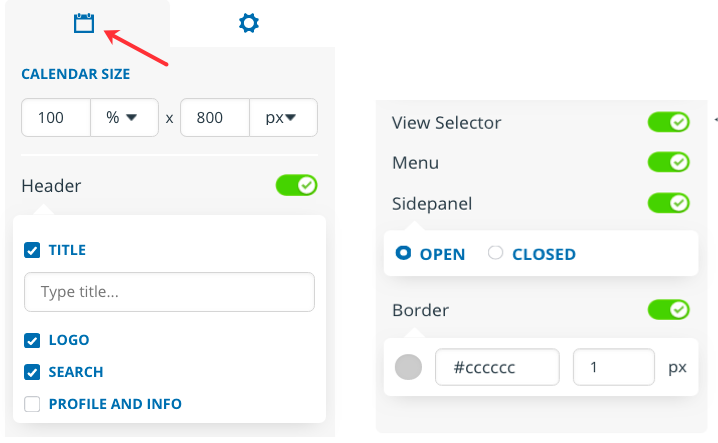
Calendar appearance
The first set of options, under the Calendar icon, allows you to control various aspects of how the calendar’s appearance. You can adjust the calendar size and title, and choose whether or not to include other calendar elements such as the logo, the search function, user account profile, view selector, menu, and the calendar side panel. You can also adjust the border of the embedded calendar.
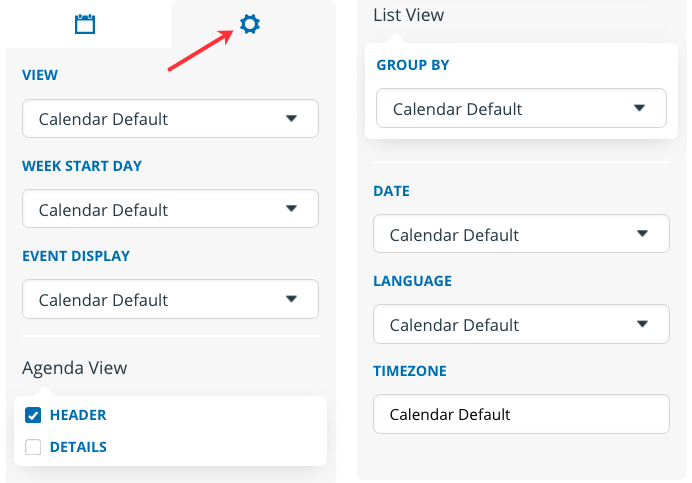
Calendar settings
Click the Gear icon to access the other settings. Here you can choose various calendar defaults, such as which calendar view to show, whether to include details in the Agenda view, and what language and time zone to use. You can leave these settings alone and they will follow the calendar default settings. Or you can adjust them as needed to customize your embedded calendar.
You can adjust various aspects of the calendar appearance and settings so it works for your needs. For example, in the calendar shown below, the calendar is set to show the current Week view and to hide the user account avatar and information for a more streamlined appearance. You can also adjust the calendar size and border.
Copy and use the iFrame code or URL
Once you have the calendar adjusted for your needs, click the blue Copy button to get the iFrame code. Then you can insert the code into your CMS, blog, or website. If you’re not sure how to insert iFrame code, contact your website administrator for help.
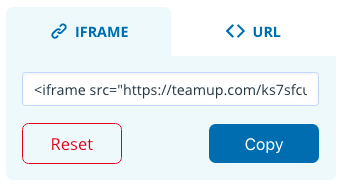
If you want to start over, click the Reset button and all the settings will return to default.
You can also click the URL tab, then click the blue Copy button to get the URL for your customized calendar. Some CMS systems, plugins, and APIs will automatically convert a URL to an embedded element. You can also share the URL via social media, messaging, or email. Open the calendar with your customized URL and save it to your calendar dashboard so you can easily access and share it anytime.
Need help? Have feedback?
Try out the new Teamup embed wizard here.
This is a new tool from Teamup. If you need help or have feedback, please contact us.