For many people, it’s a pleasure to open their colorful Teamup calendar. However, the colors may also be a source of distraction. A quick way to minimize the distraction and see only the events you need to see now is to use the filter function.
Once you have only the events on your screen that you need to focus on, you can also print it to a PDF file or to a piece of paper to take it along or to keep – so you can concentrate on just what’s on your schedule!
This is really easy to accomplish using Teamup. Here’s how!
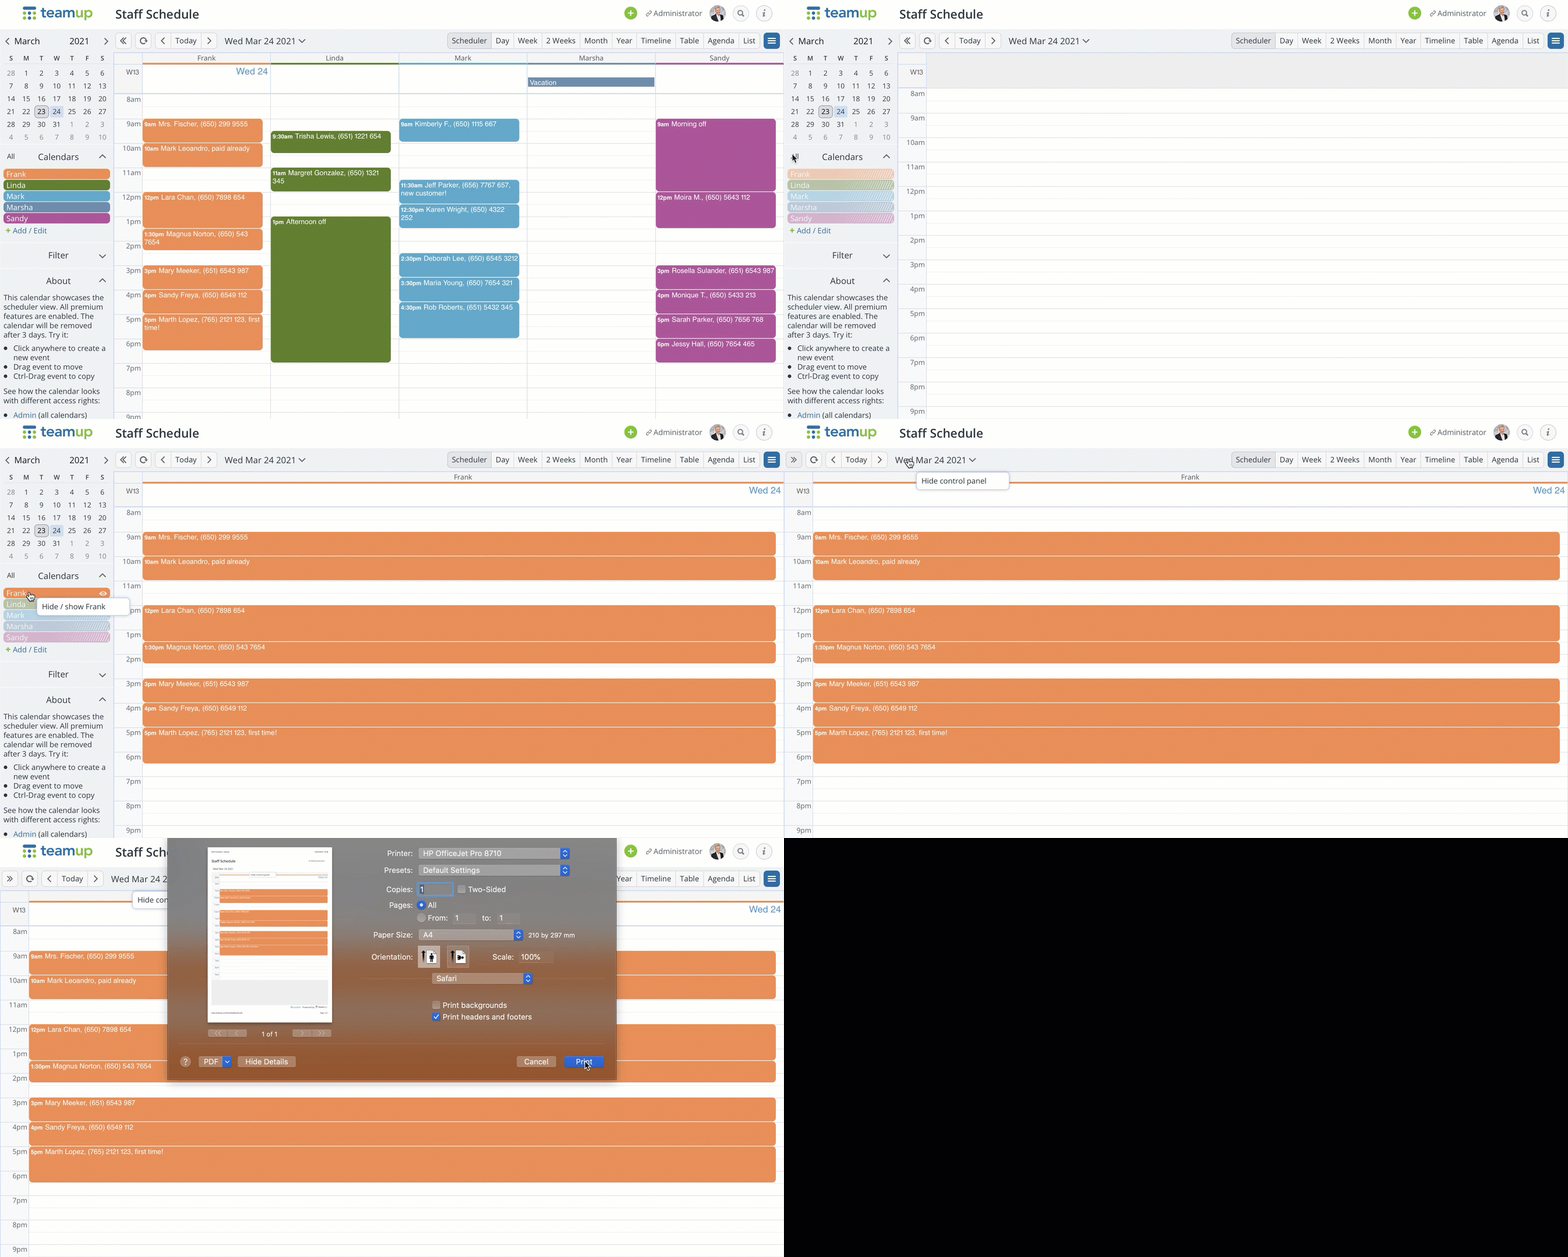
- Open the applicable calendar. In this example, we open a Staff Schedule calendar.
- Select the calendar view you want on the top right – in this example, we chose scheduler view.
- In the Control panel on the left, Click on All above the calendar list to hide all calendars, then Click on the calendar you wish to view. In this example, we chose Frank, so only Frank’s scheduled events will be displayed and printed.
- Hide the Control Panel by Clicking on <<
- Ctrl-P on PC or Cmd-P on Mac to PRINT. Take the default and hit Print; or adjust the print settings before printing.

Pro Tips
- You can print a schedule or calendar with a custom title.
- Use these templates to print a blank calendar at any time in the style you want.
- If event titles are not displaying fully, adjust the calendar resolution to create more space for each event so the title can be seen in full, then print.

